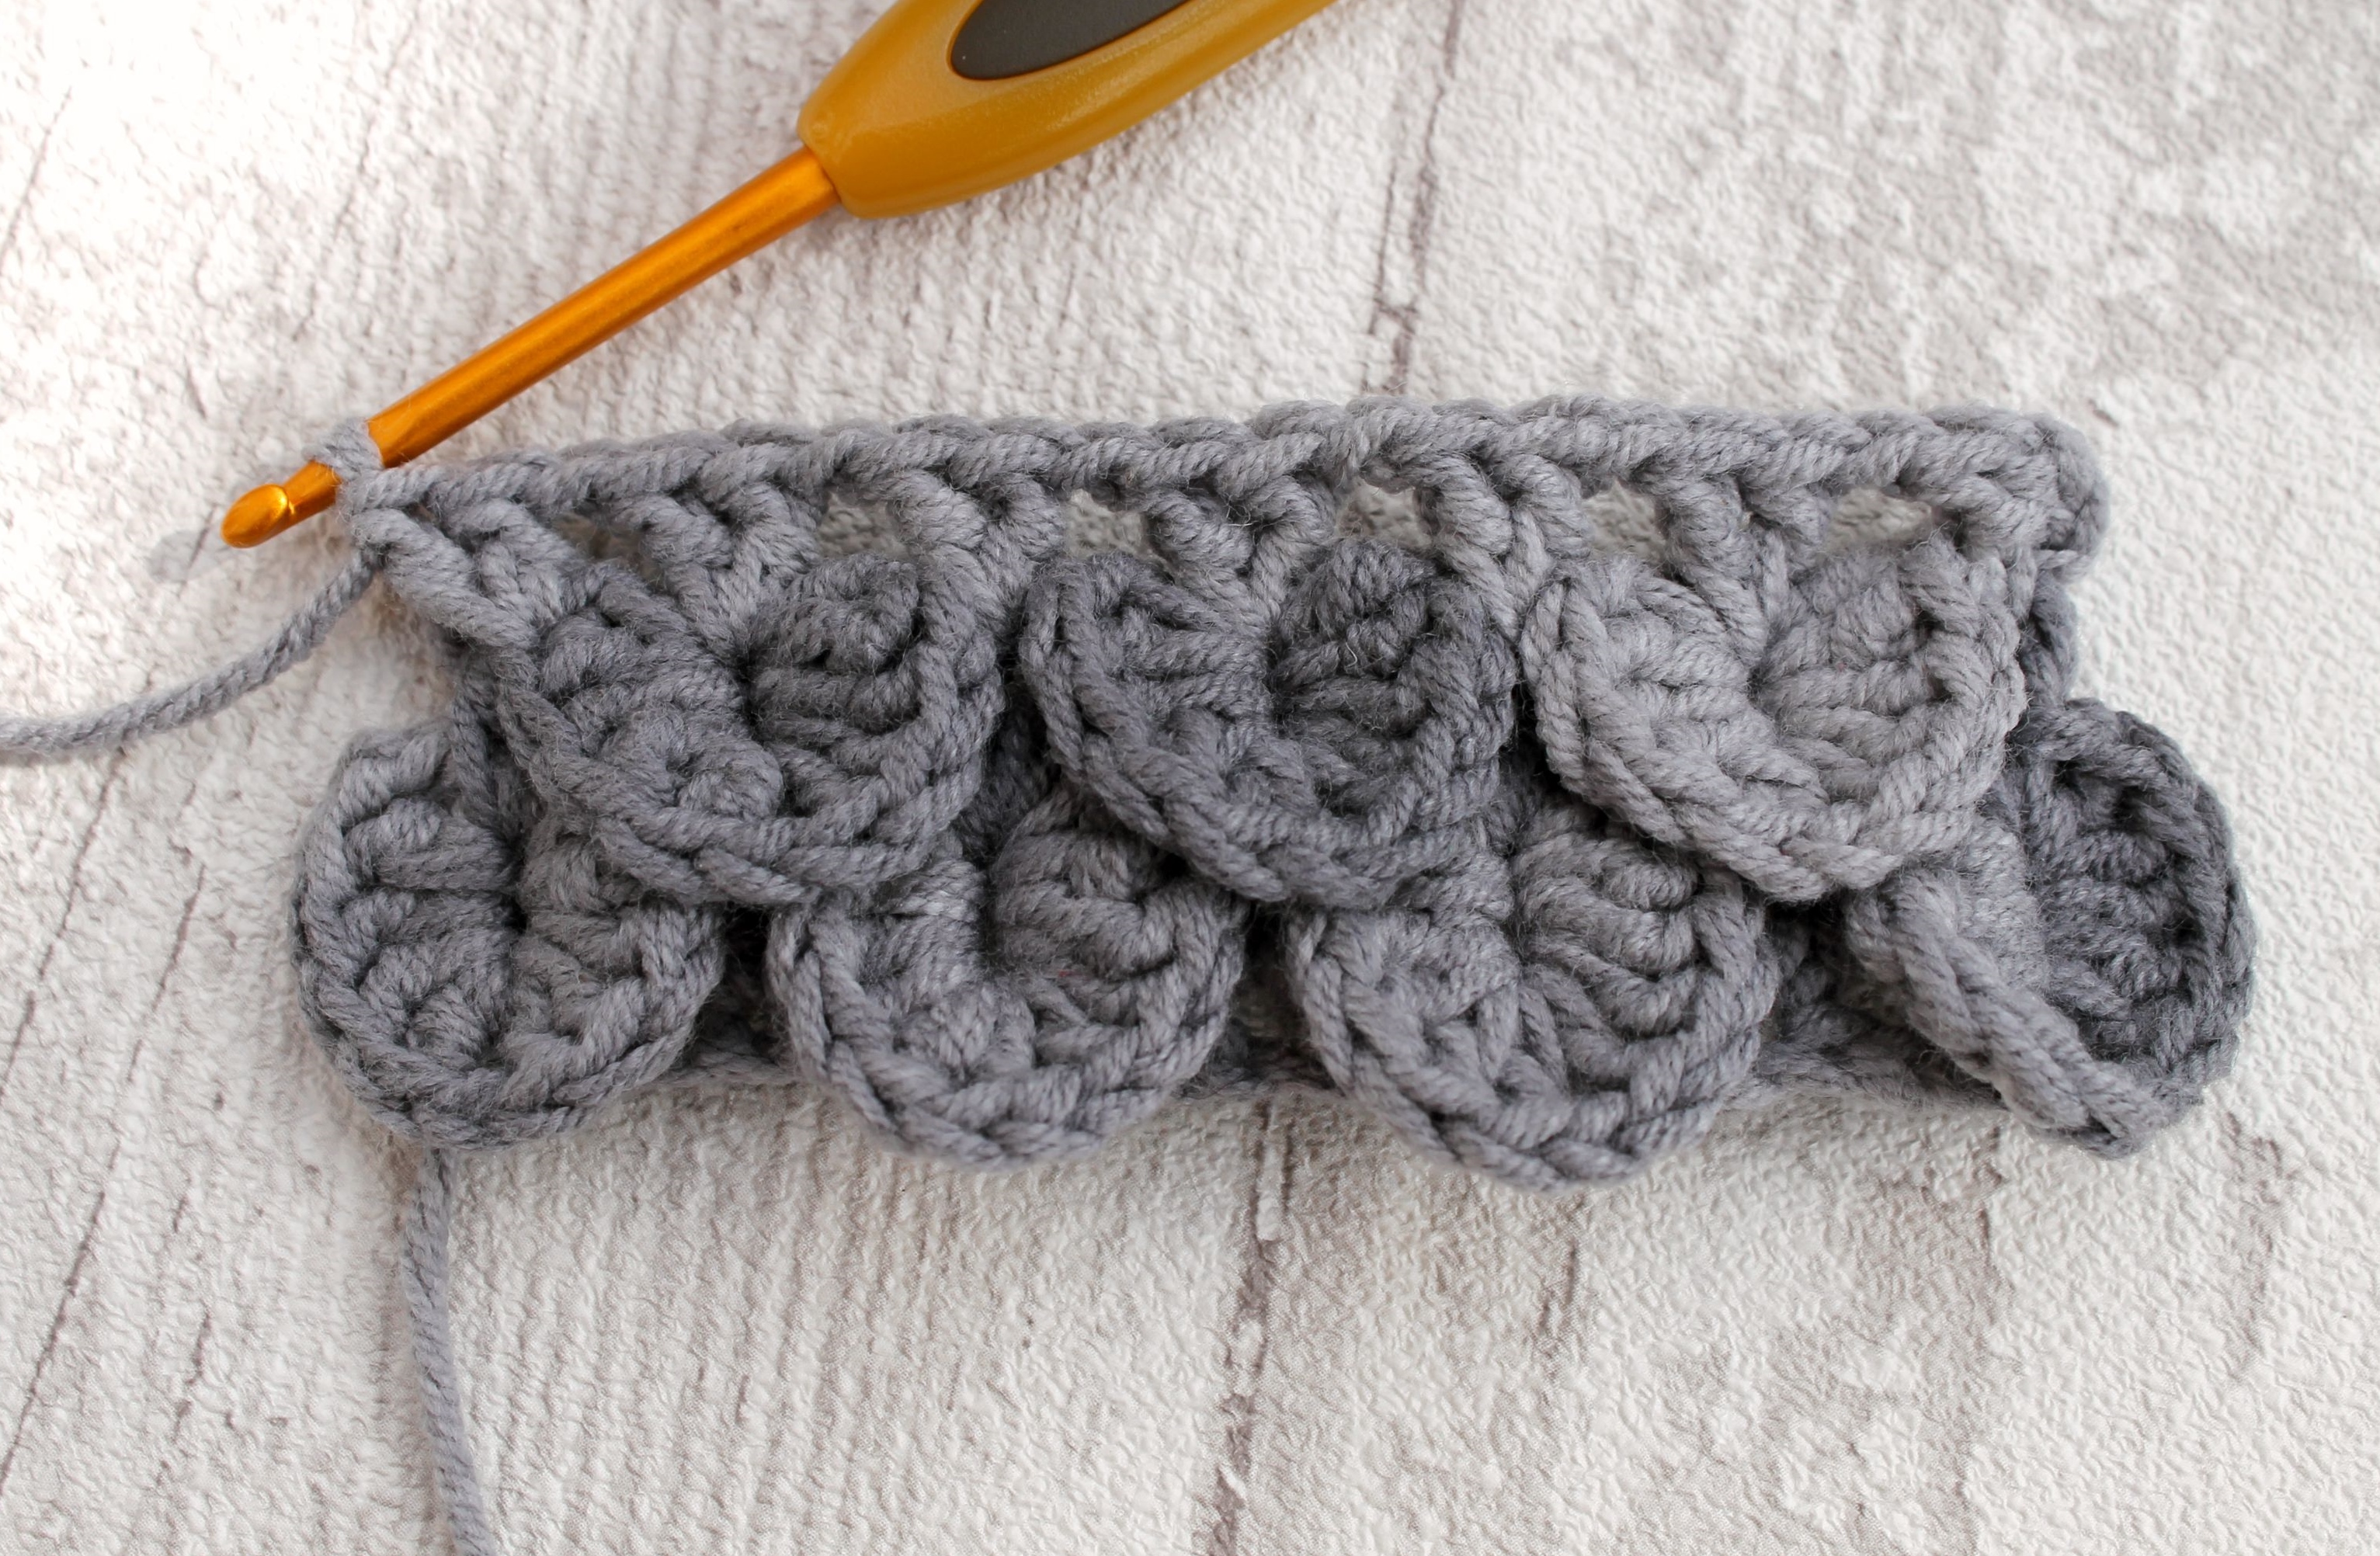
One of the crochet stitches that’s important for the house bag is the crocodile stitch. Look, here it is, used for the roof of the house, which forms the flap for the bag:-
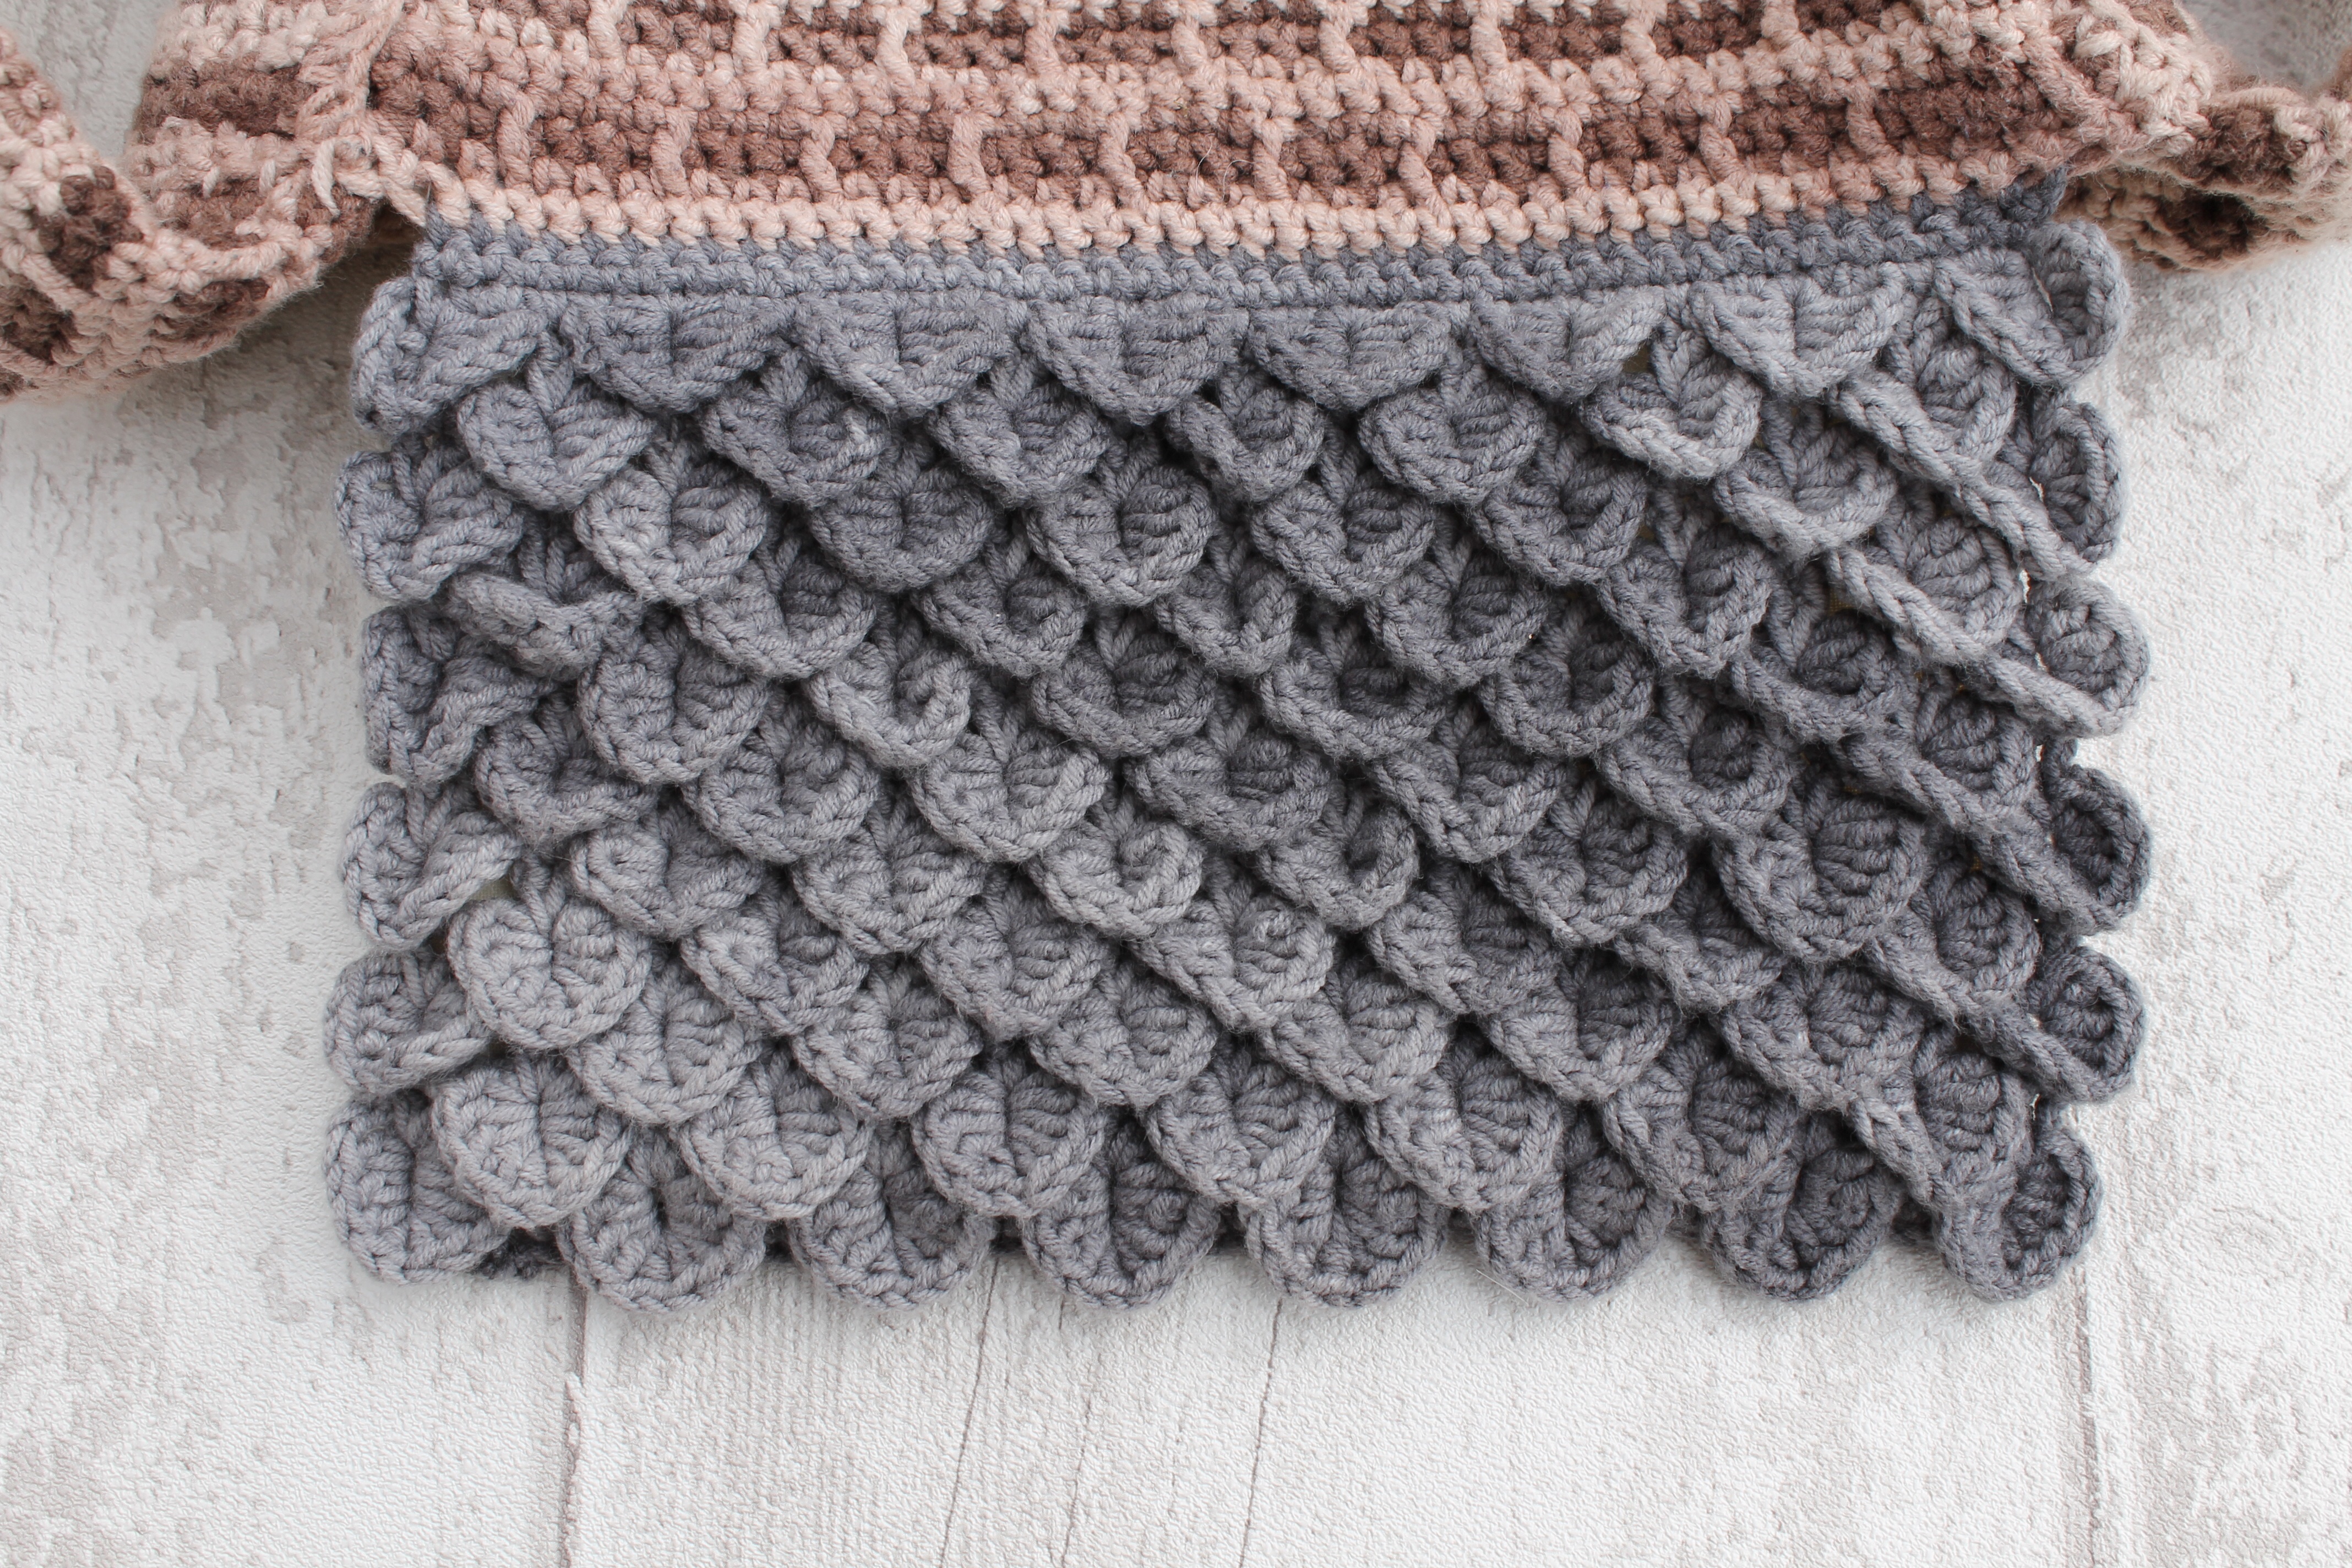
It’s not difficult but it looks fancy, and it’s a stitch that works well for scarves. Since you work the scales one-at-a-time, it can carry a variegated yarn quite well, more so than – say – a granny square, which can get weirdly splodgy in a variegated yarn.

Just don’t make an entire cardigan in this stitch, especially not in green, or you will look like an actual crocodile – which is not a good look (except on crocodiles, of course).
Whilst I finish off writing up the bag pattern, I thought I’d put together these instructions, because although there are a lot of crocodile stitch tutorials out there, they really do vary in quality. (I found this out the hard way when I was first learning the technique.) Here’s a version that most definitely works. And it really is easy. So without further ado, permit me to present… the crochet crocodile stitch photo-tutorial:-
(Actually there is a bit of further ado.) PLEASE NOTE: NORTH AMERICAN CROCHET TERMS USED THROUGHOUT.
Abbreviations:-
ch = chain
ss = slip stitch
dc = double crochet (which would be a treble in UK crochet terms)
sk = skip
st/sts = stitch/stitches
1. Chain multiples of 6+1. Just to orientate you, you’re beginning at the bottom of your work and progressing upwards. In the little sample I’m making below, I’ve chained 19, i.e. (3×6)+1. This will give me a piece with rows alternating between 4 scales and 3 scales wide, like this:-
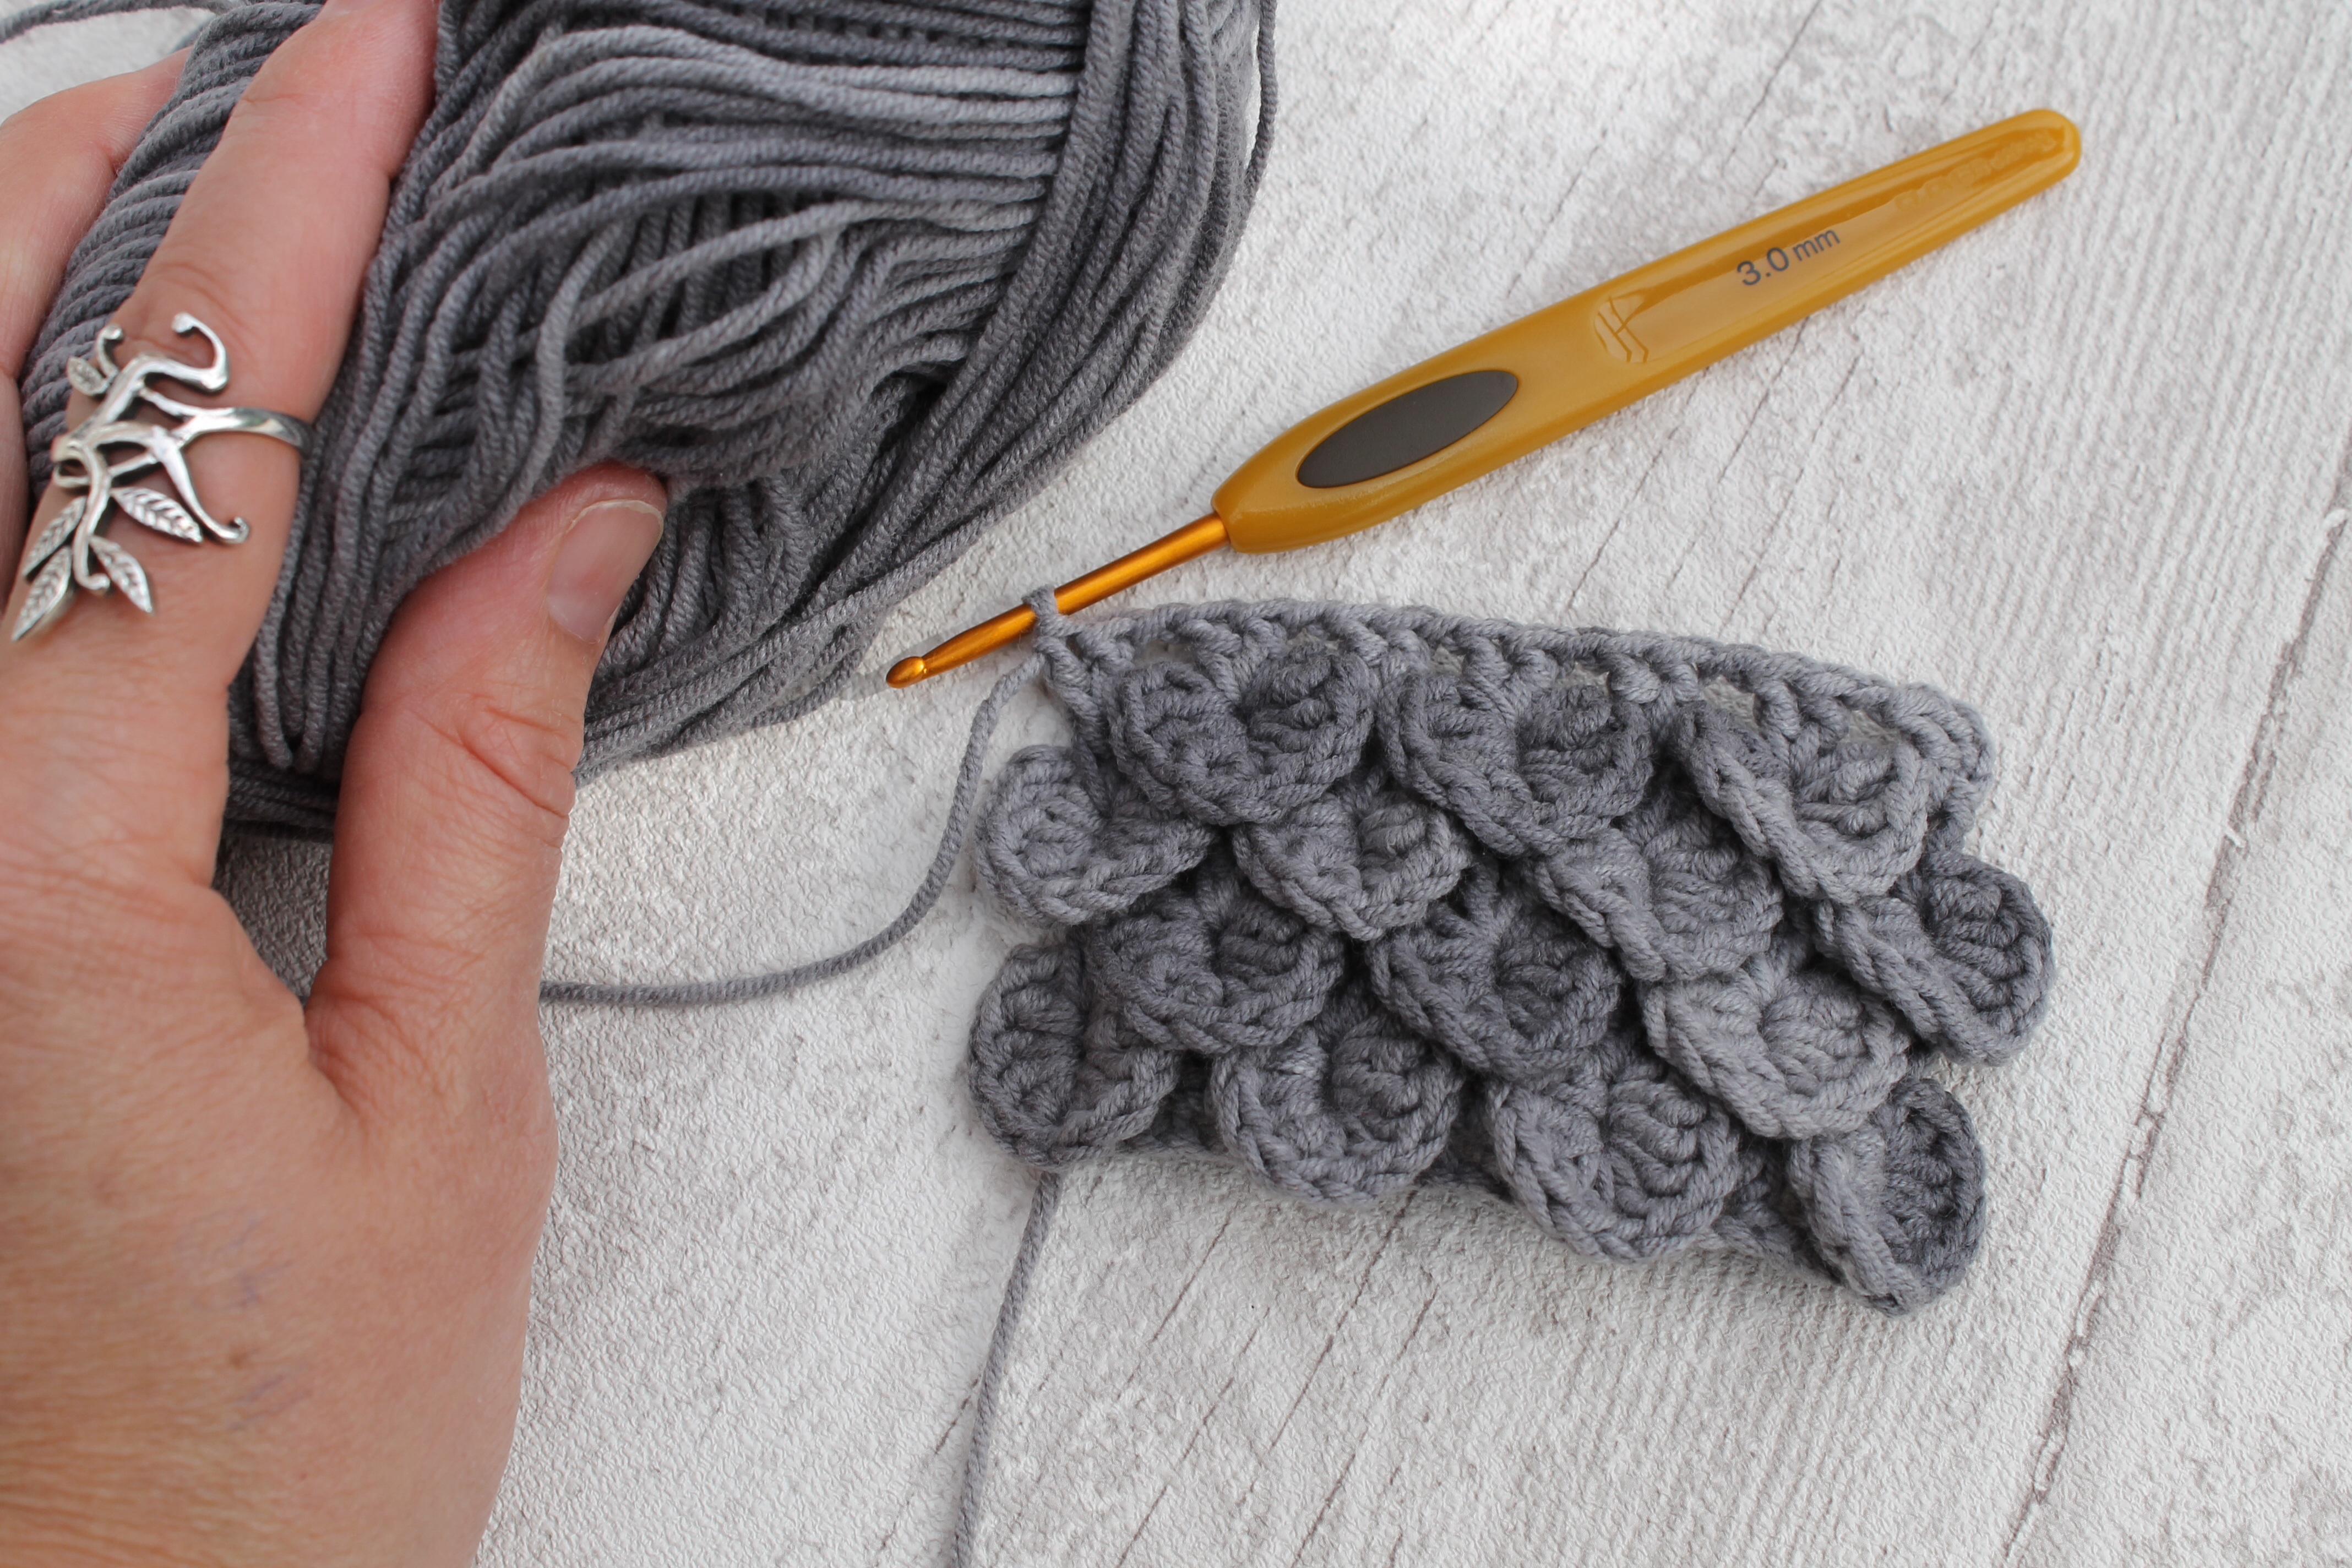
2. Pinch your last chain and ch3 (to act as your first dc). 1dc into the st you’ve pinched. (Ch1. Sk2 links of chain and work 2dc into next stitch) until the end of the row. (You should find yourself working 2dc into the final stitch.) You will have made something that looks rather like a ladder. There will be an odd number of pairs of dcs:-
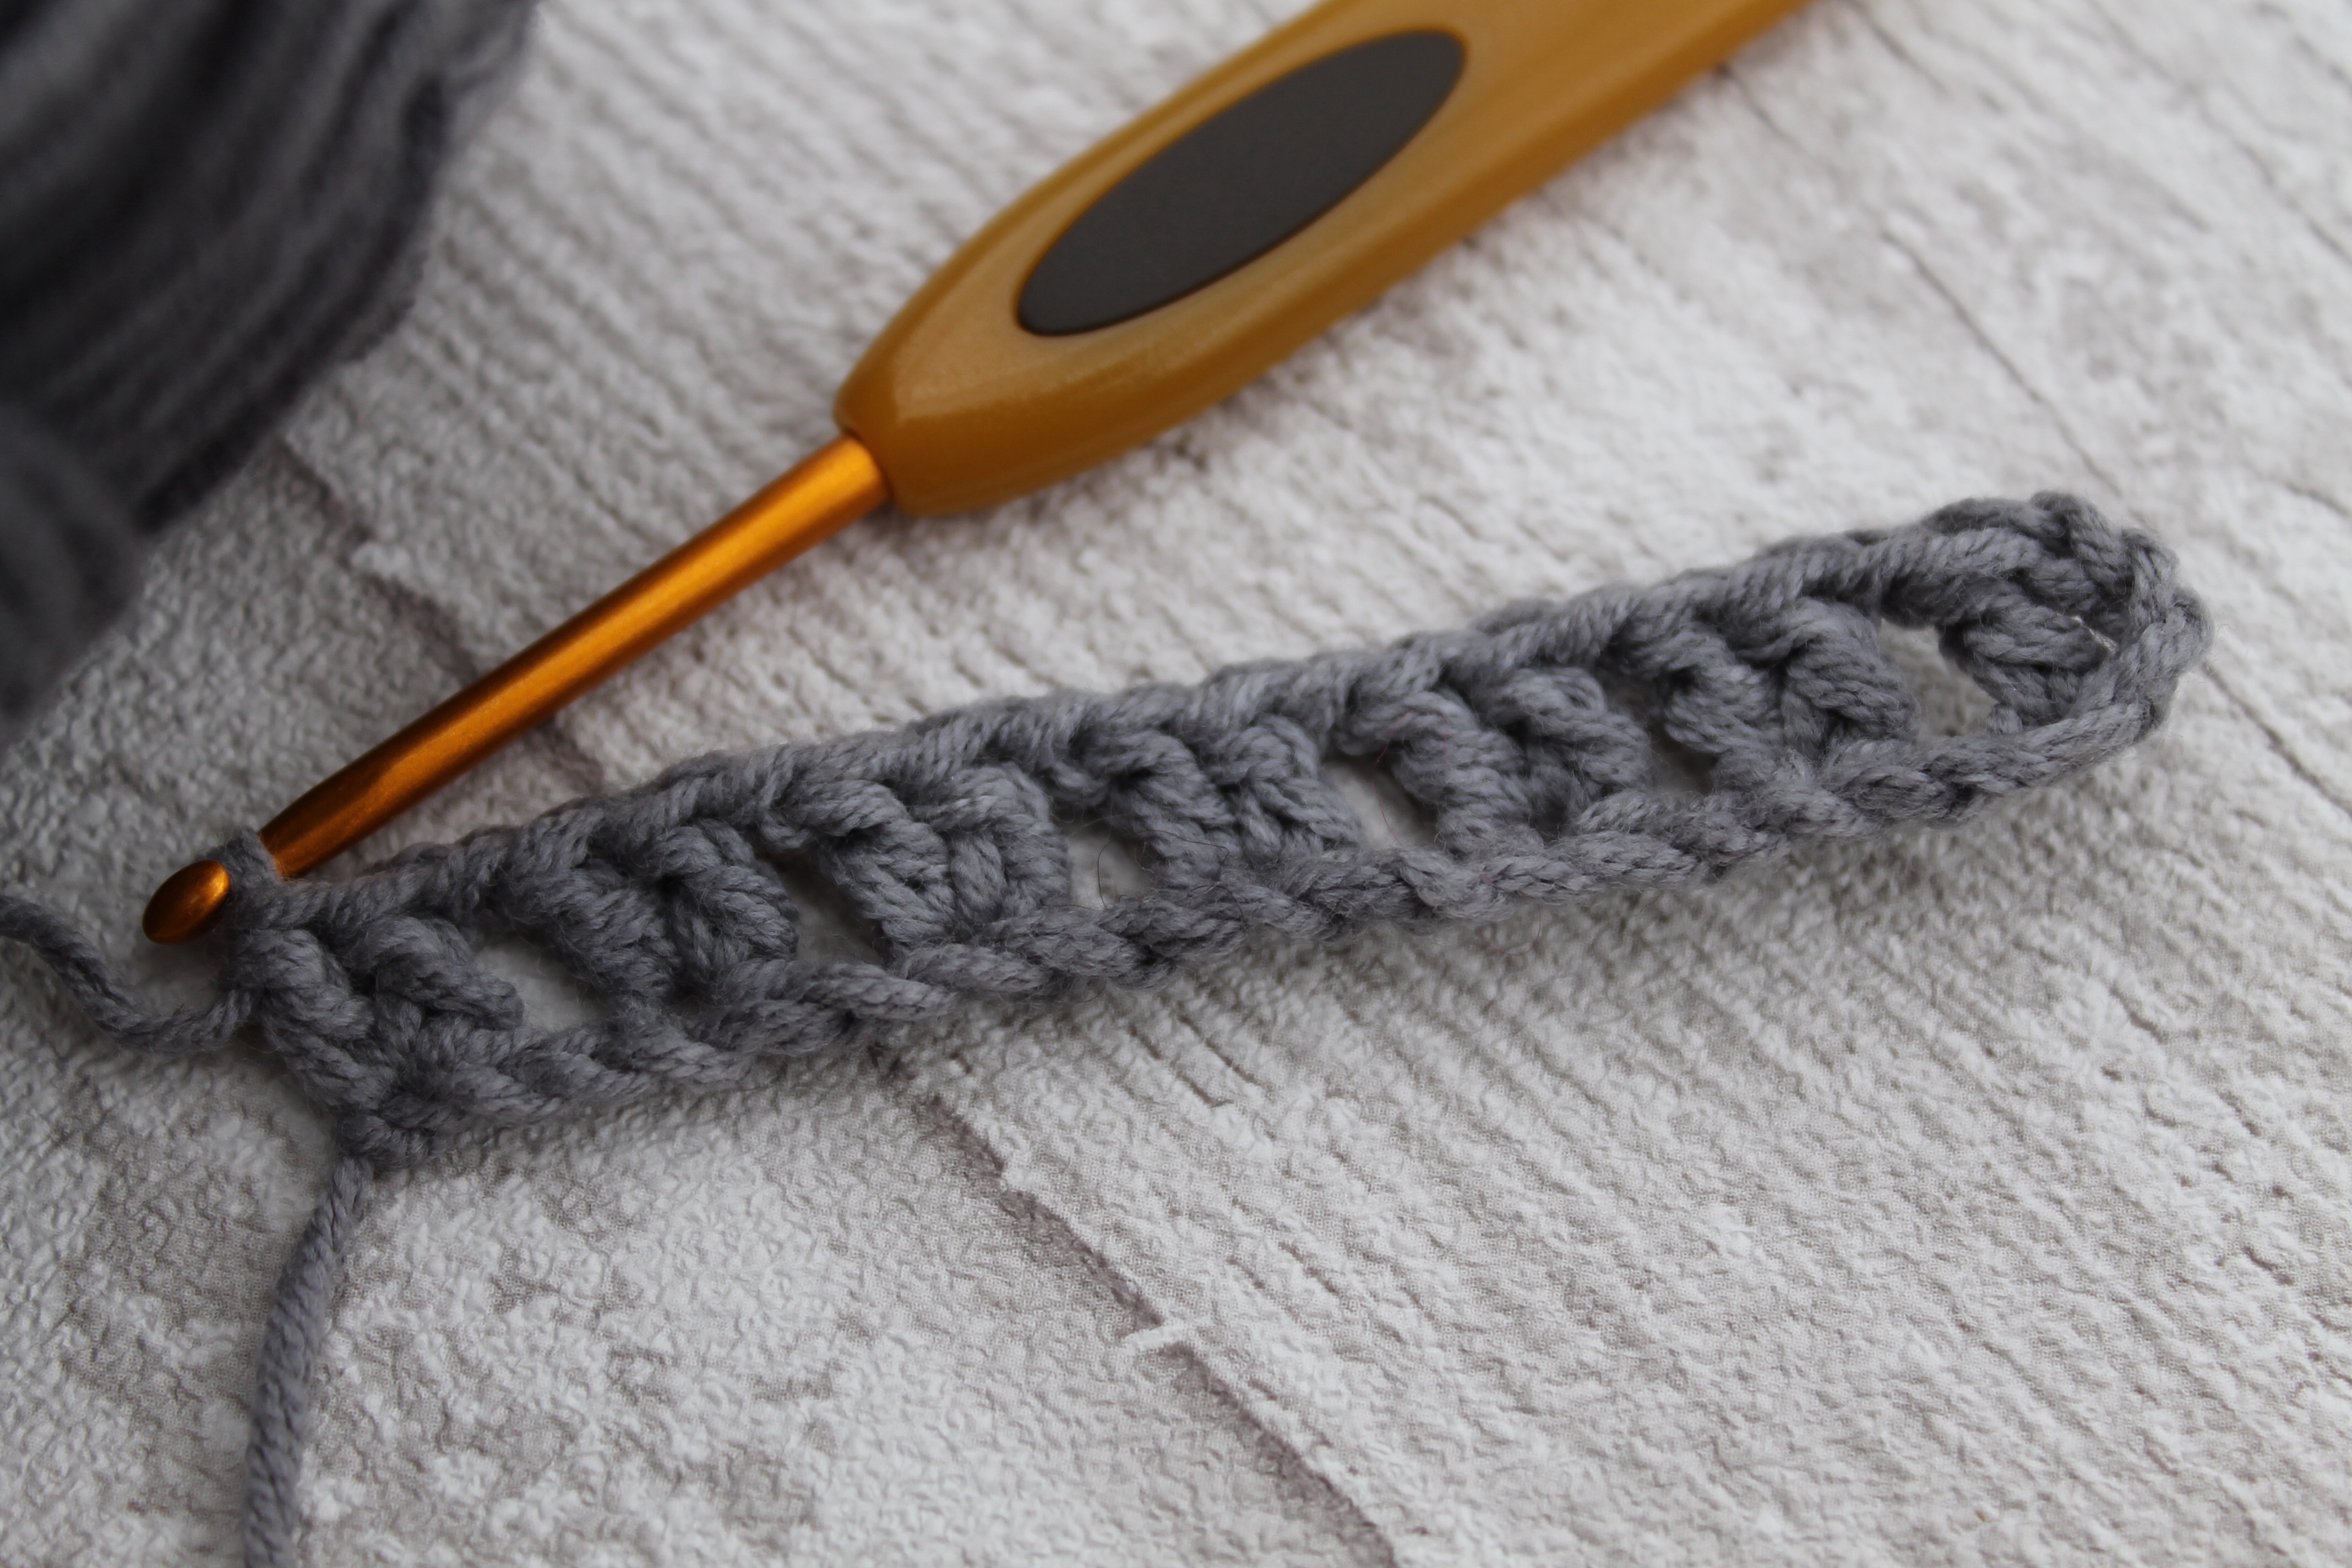
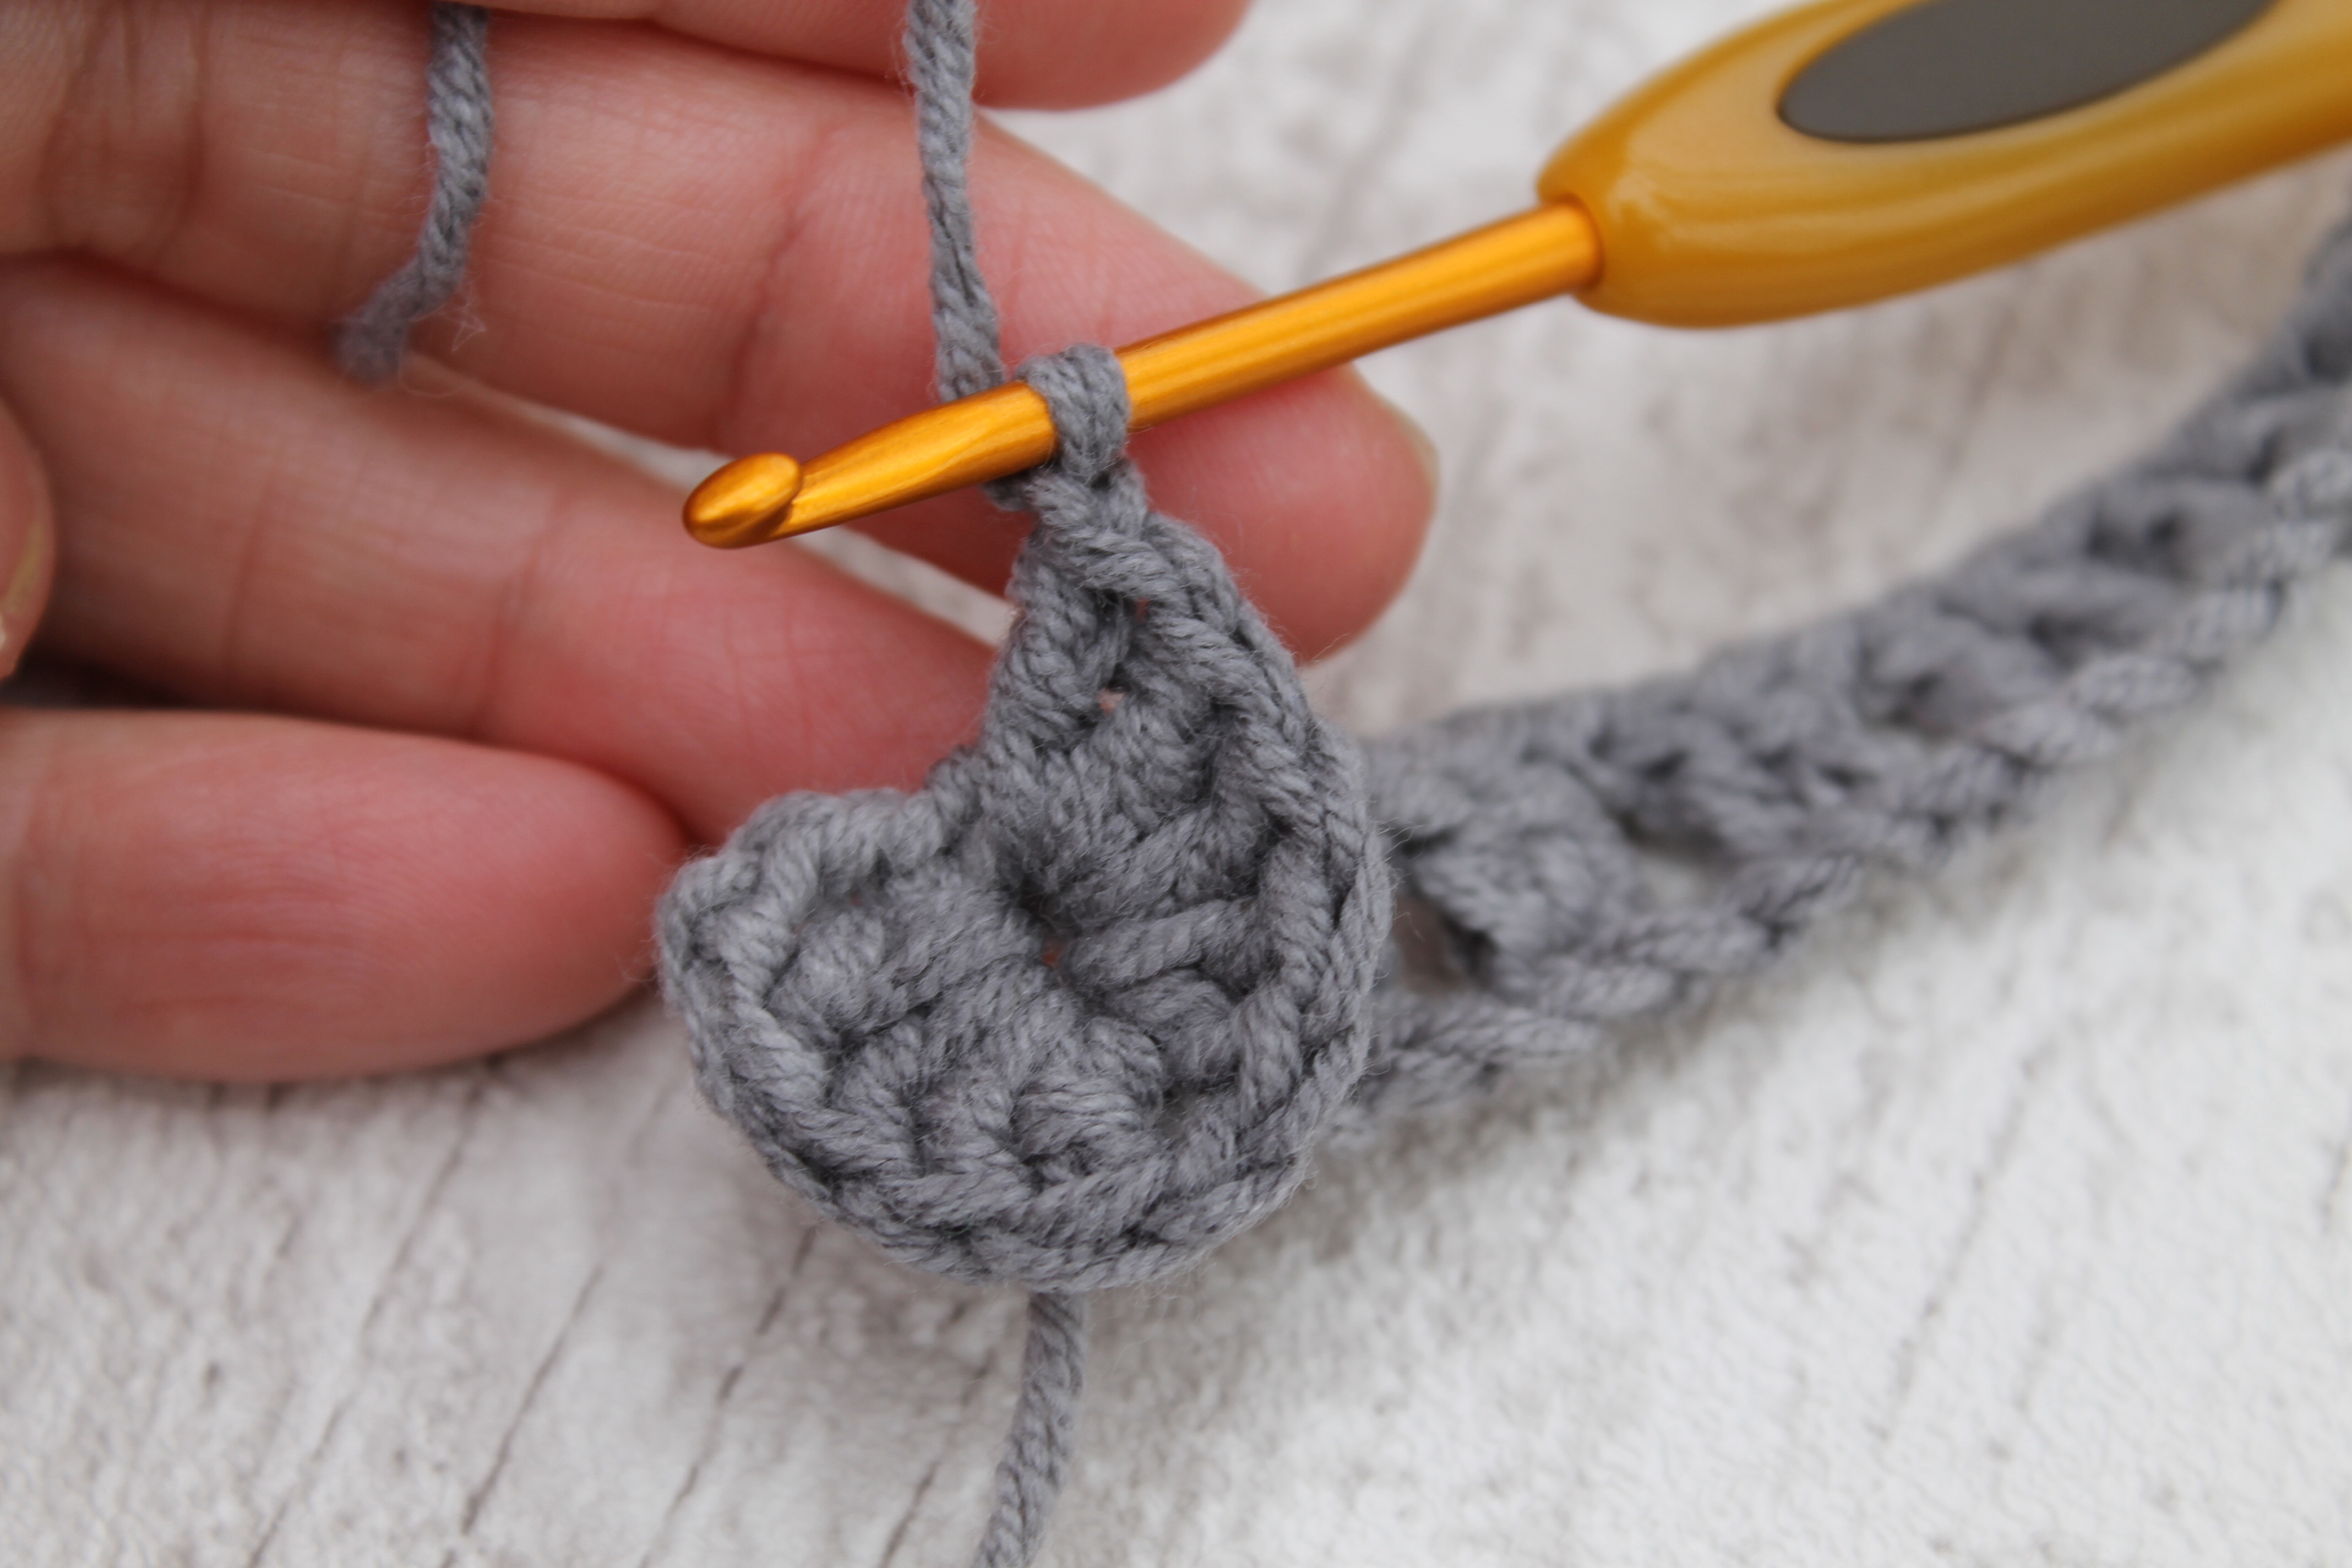
3. Turn your work clockwise through 90◦ so that your ladder is hanging downwards. To make the crocodile scale, you’re going to work stitches into the gap between the pair of dc posts, initially from right to left down the first dc, and then back up the other side via the other dc in this first pair. So, ch3 (counts as your first dc), then, working from right to left along the first dc, make 4dc. Ch1.
Turn your work through 180◦ so that the rung of the ladder you’re working on is now at the bottom. Working from right to left, make 5dc in the second of the pair of dc stitches from row 2.
Now ch1. You’ve made a scale.
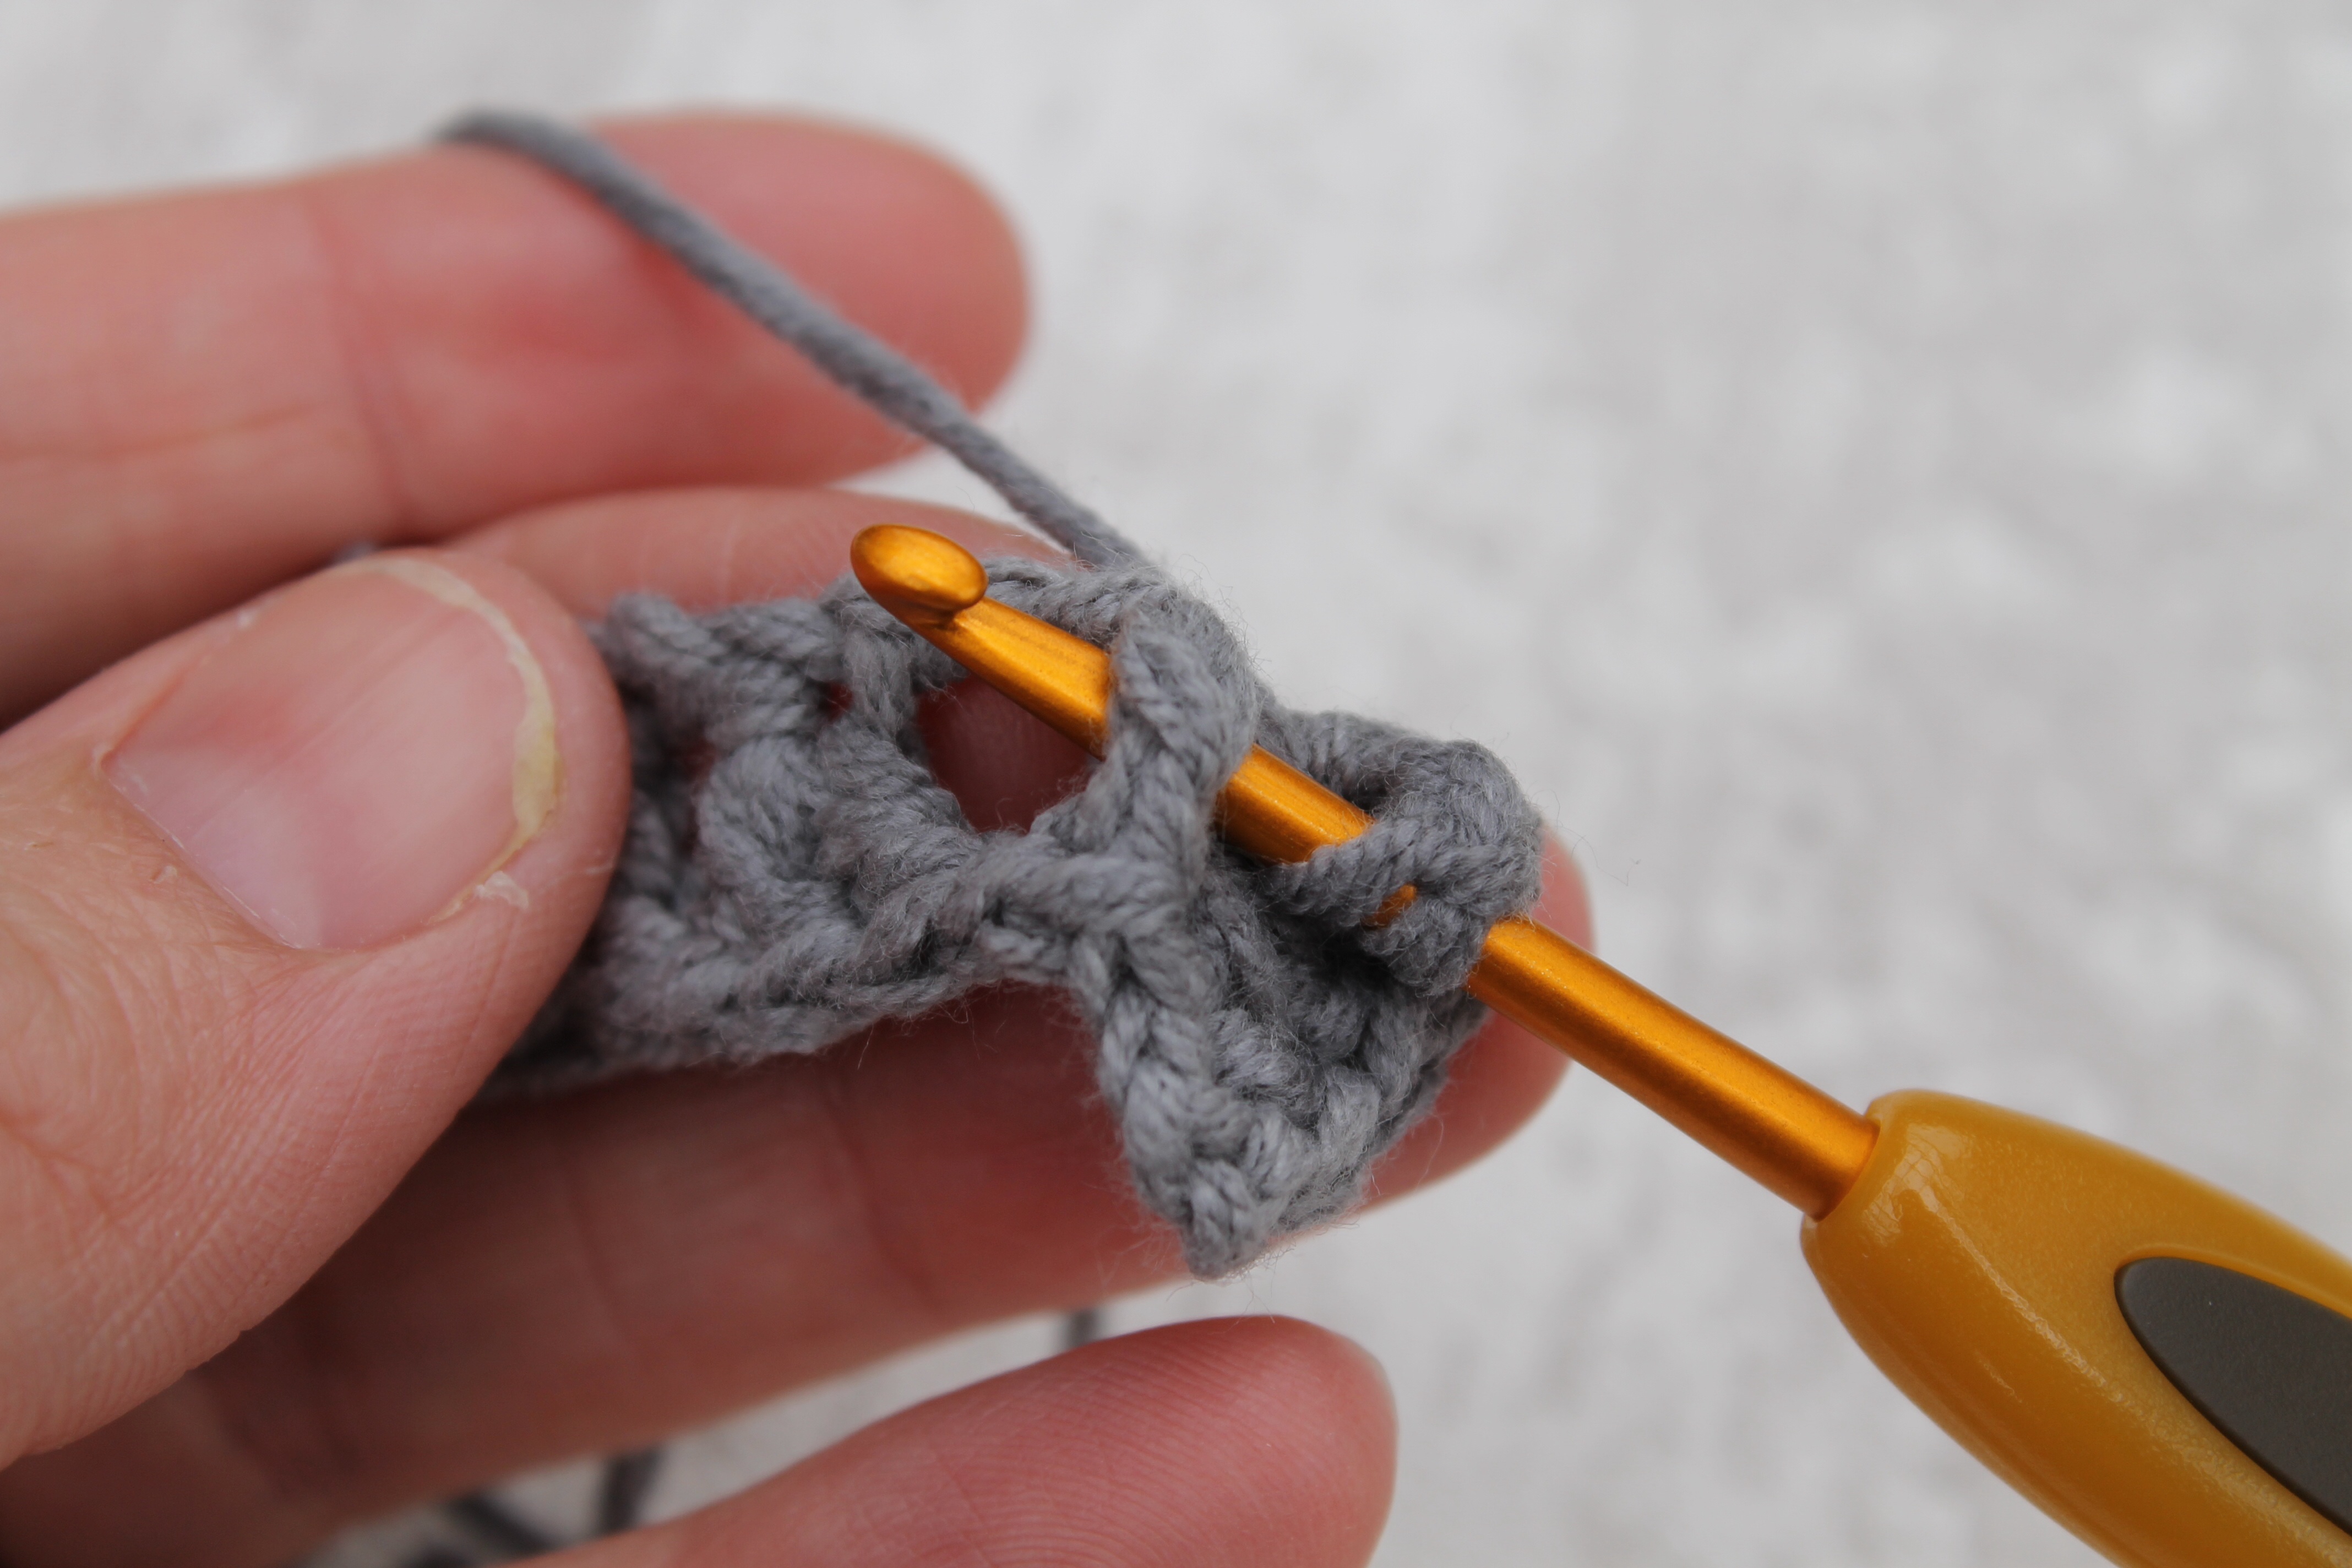
4. Turn your ladder through 180◦ again, so that it’s hanging downwards. Skip the next pair of dc sts from row 2 and instead work 5dc from right to left into the first dc of the following pair. Ch1, then turn your work through 180◦ and work another 5dc back up the other dc of the pair. Ch1.
5. Continue in this way, working down and then up every alternate pair of the dcs that you made in row 2. You should finish on the final pair of dcs and should now have 4 scales. Instead of your final ch1, work a ss into the top of the middle of the last scale, so that its right hand side curves nicely at the top. Your scales won’t look very neat at the moment but don’t worry, as you work the next (set-up) row, you’ll anchor them in place and make them behave.
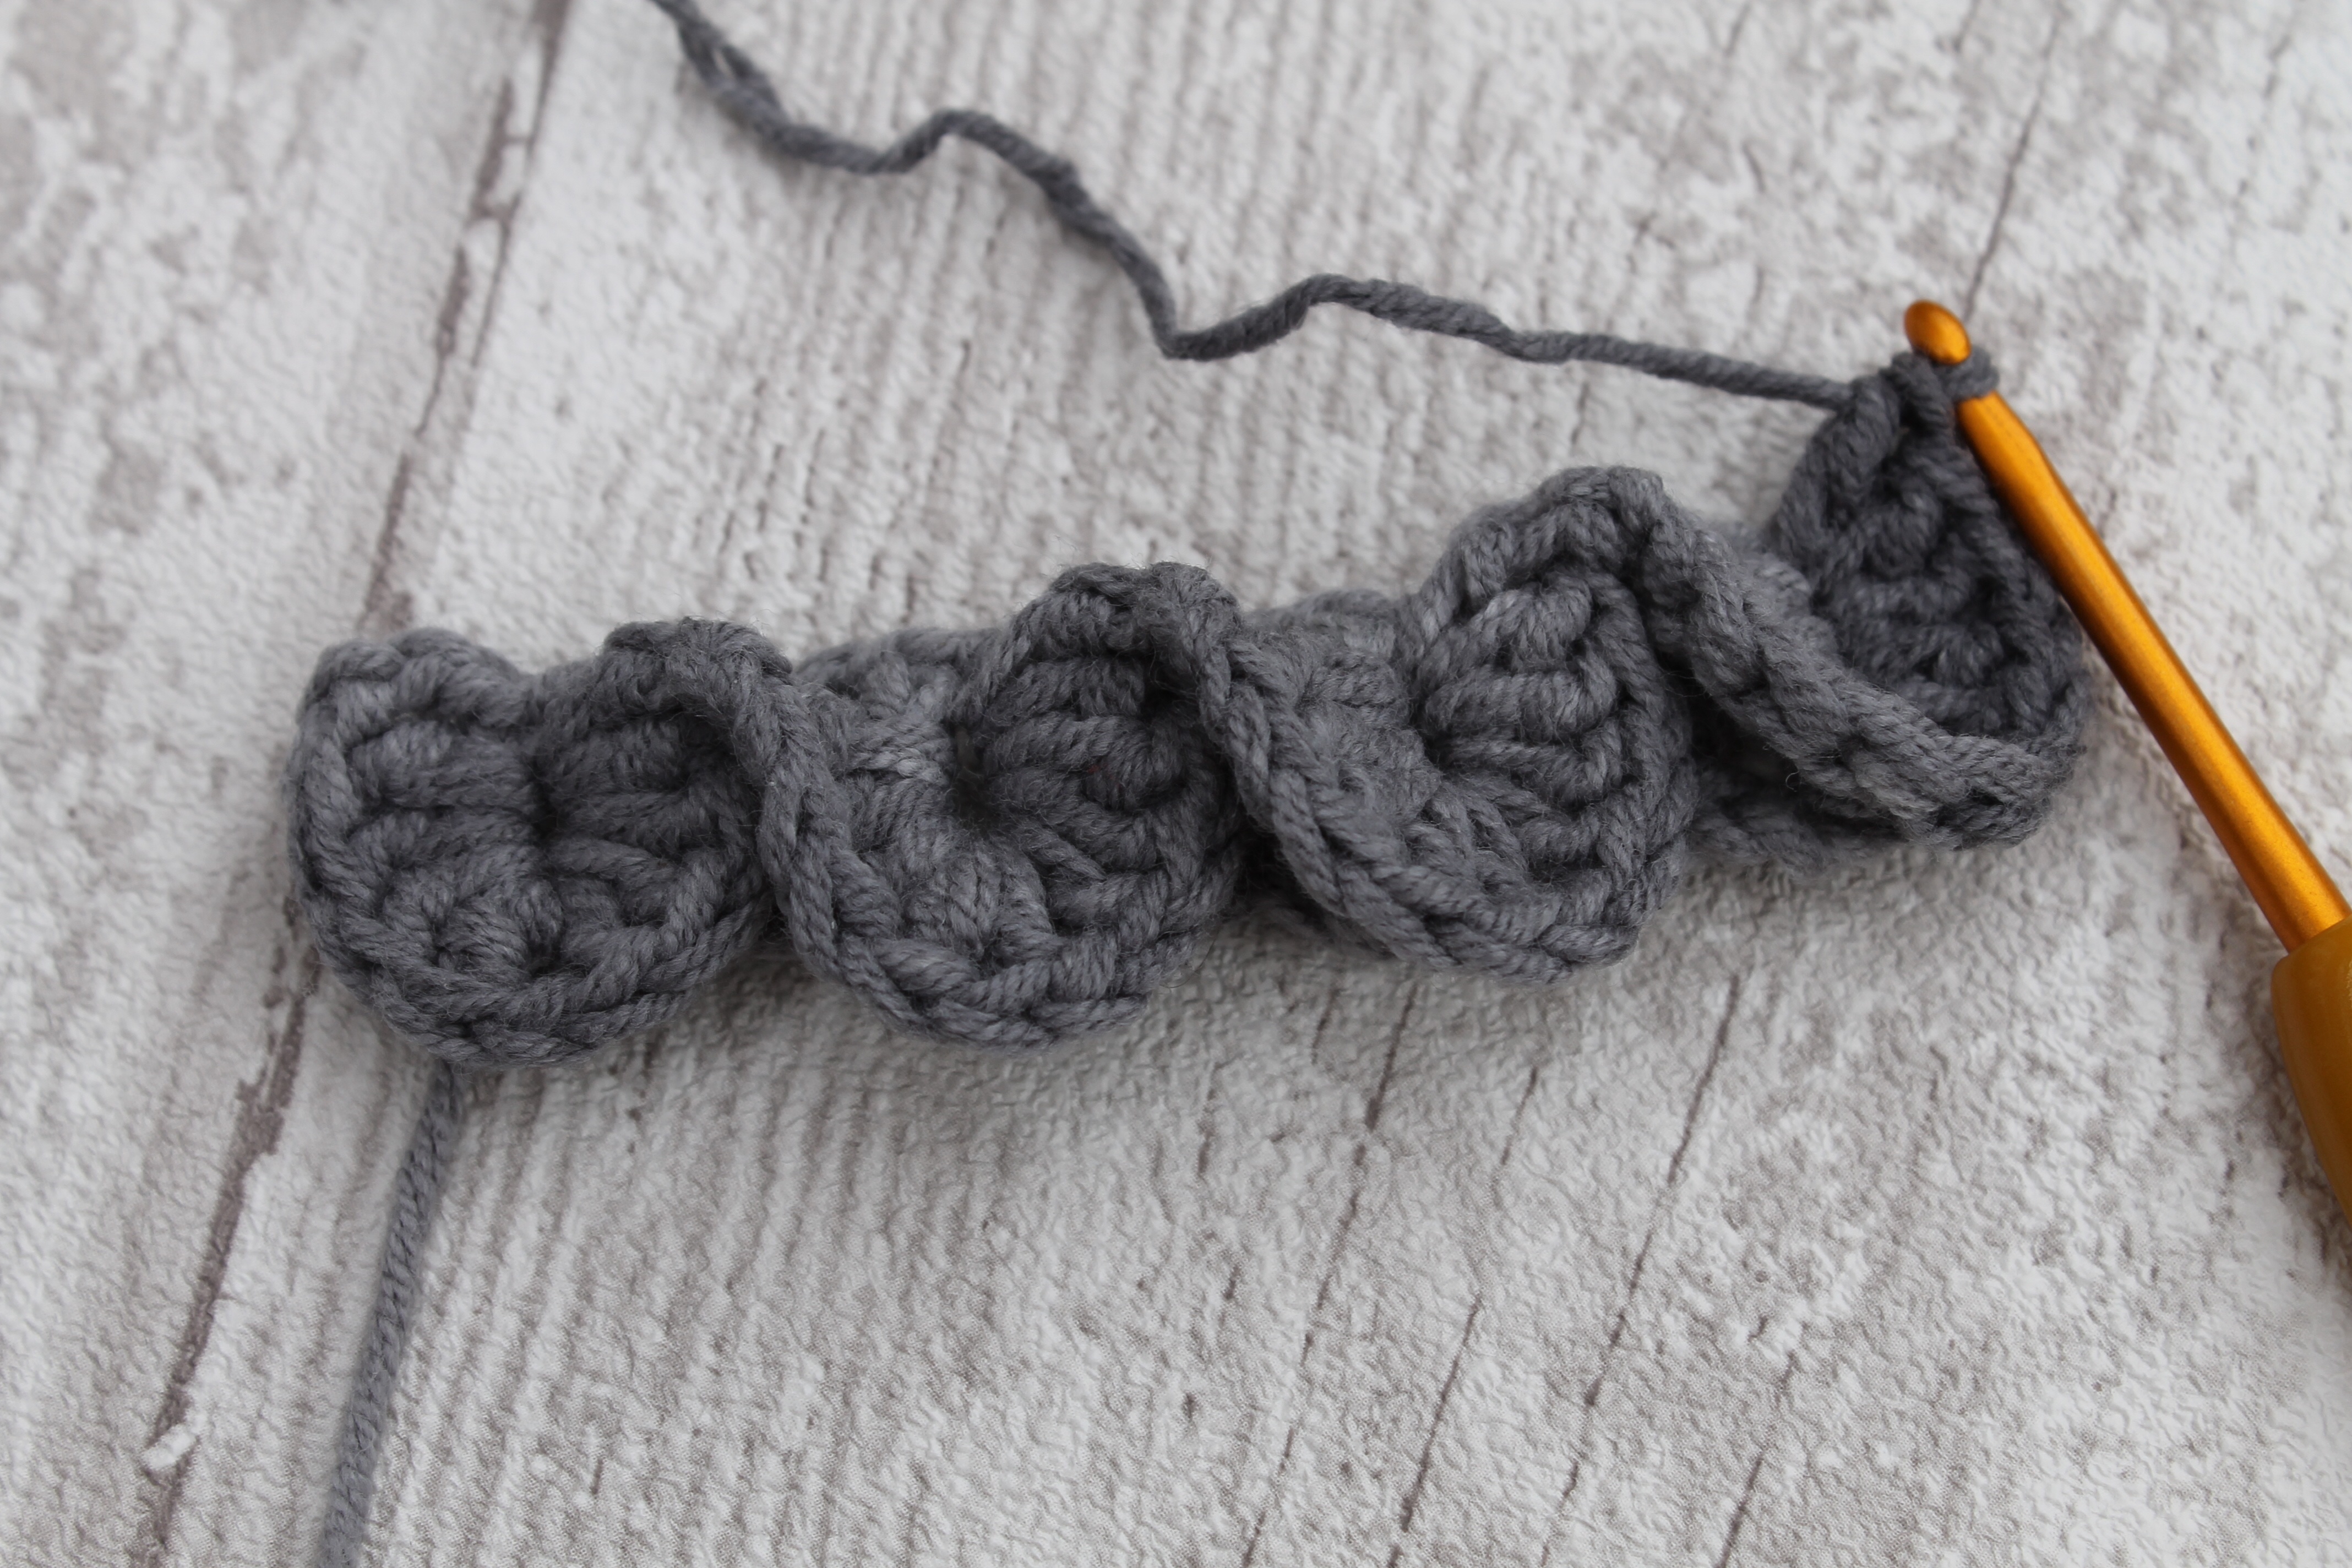
6. Hold your work horizontally with the scales facing you and pointing downwards, and with your initial chain at the bottom. You’ll now make a new row of pairs of dcs, each pair separated by a ch1, with each pair worked into the gap between one of the pairs of dcs below. Where this coincides with the edges of two scales (ie alternate occasions), you work your dcs into the ch1 between scales as well as into the gap between dcs, thus anchoring these together. The first dc of the very first pair only should be replaced by a ch3. You should have the same number of pairs of dcs as in row 2, i.e. 7 pairs in this example.
7. You’re now going to work across again with another set of scales. However, on this row you will make one fewer scales than before – 3 in this case – because they’re slightly offset from the previous row. So, no need to begin with a ch3 this time. Instead, work 5dcs from top to bottom into the first post of the second pair of dcs. Ch1. Work 5dcs up the other side. Ch1. Continue working scales across the row until you have 3. This time, you’ll finish the final scale with a ss into the last pair of dcs, and your scale will not protrude any further than this pair of posts.
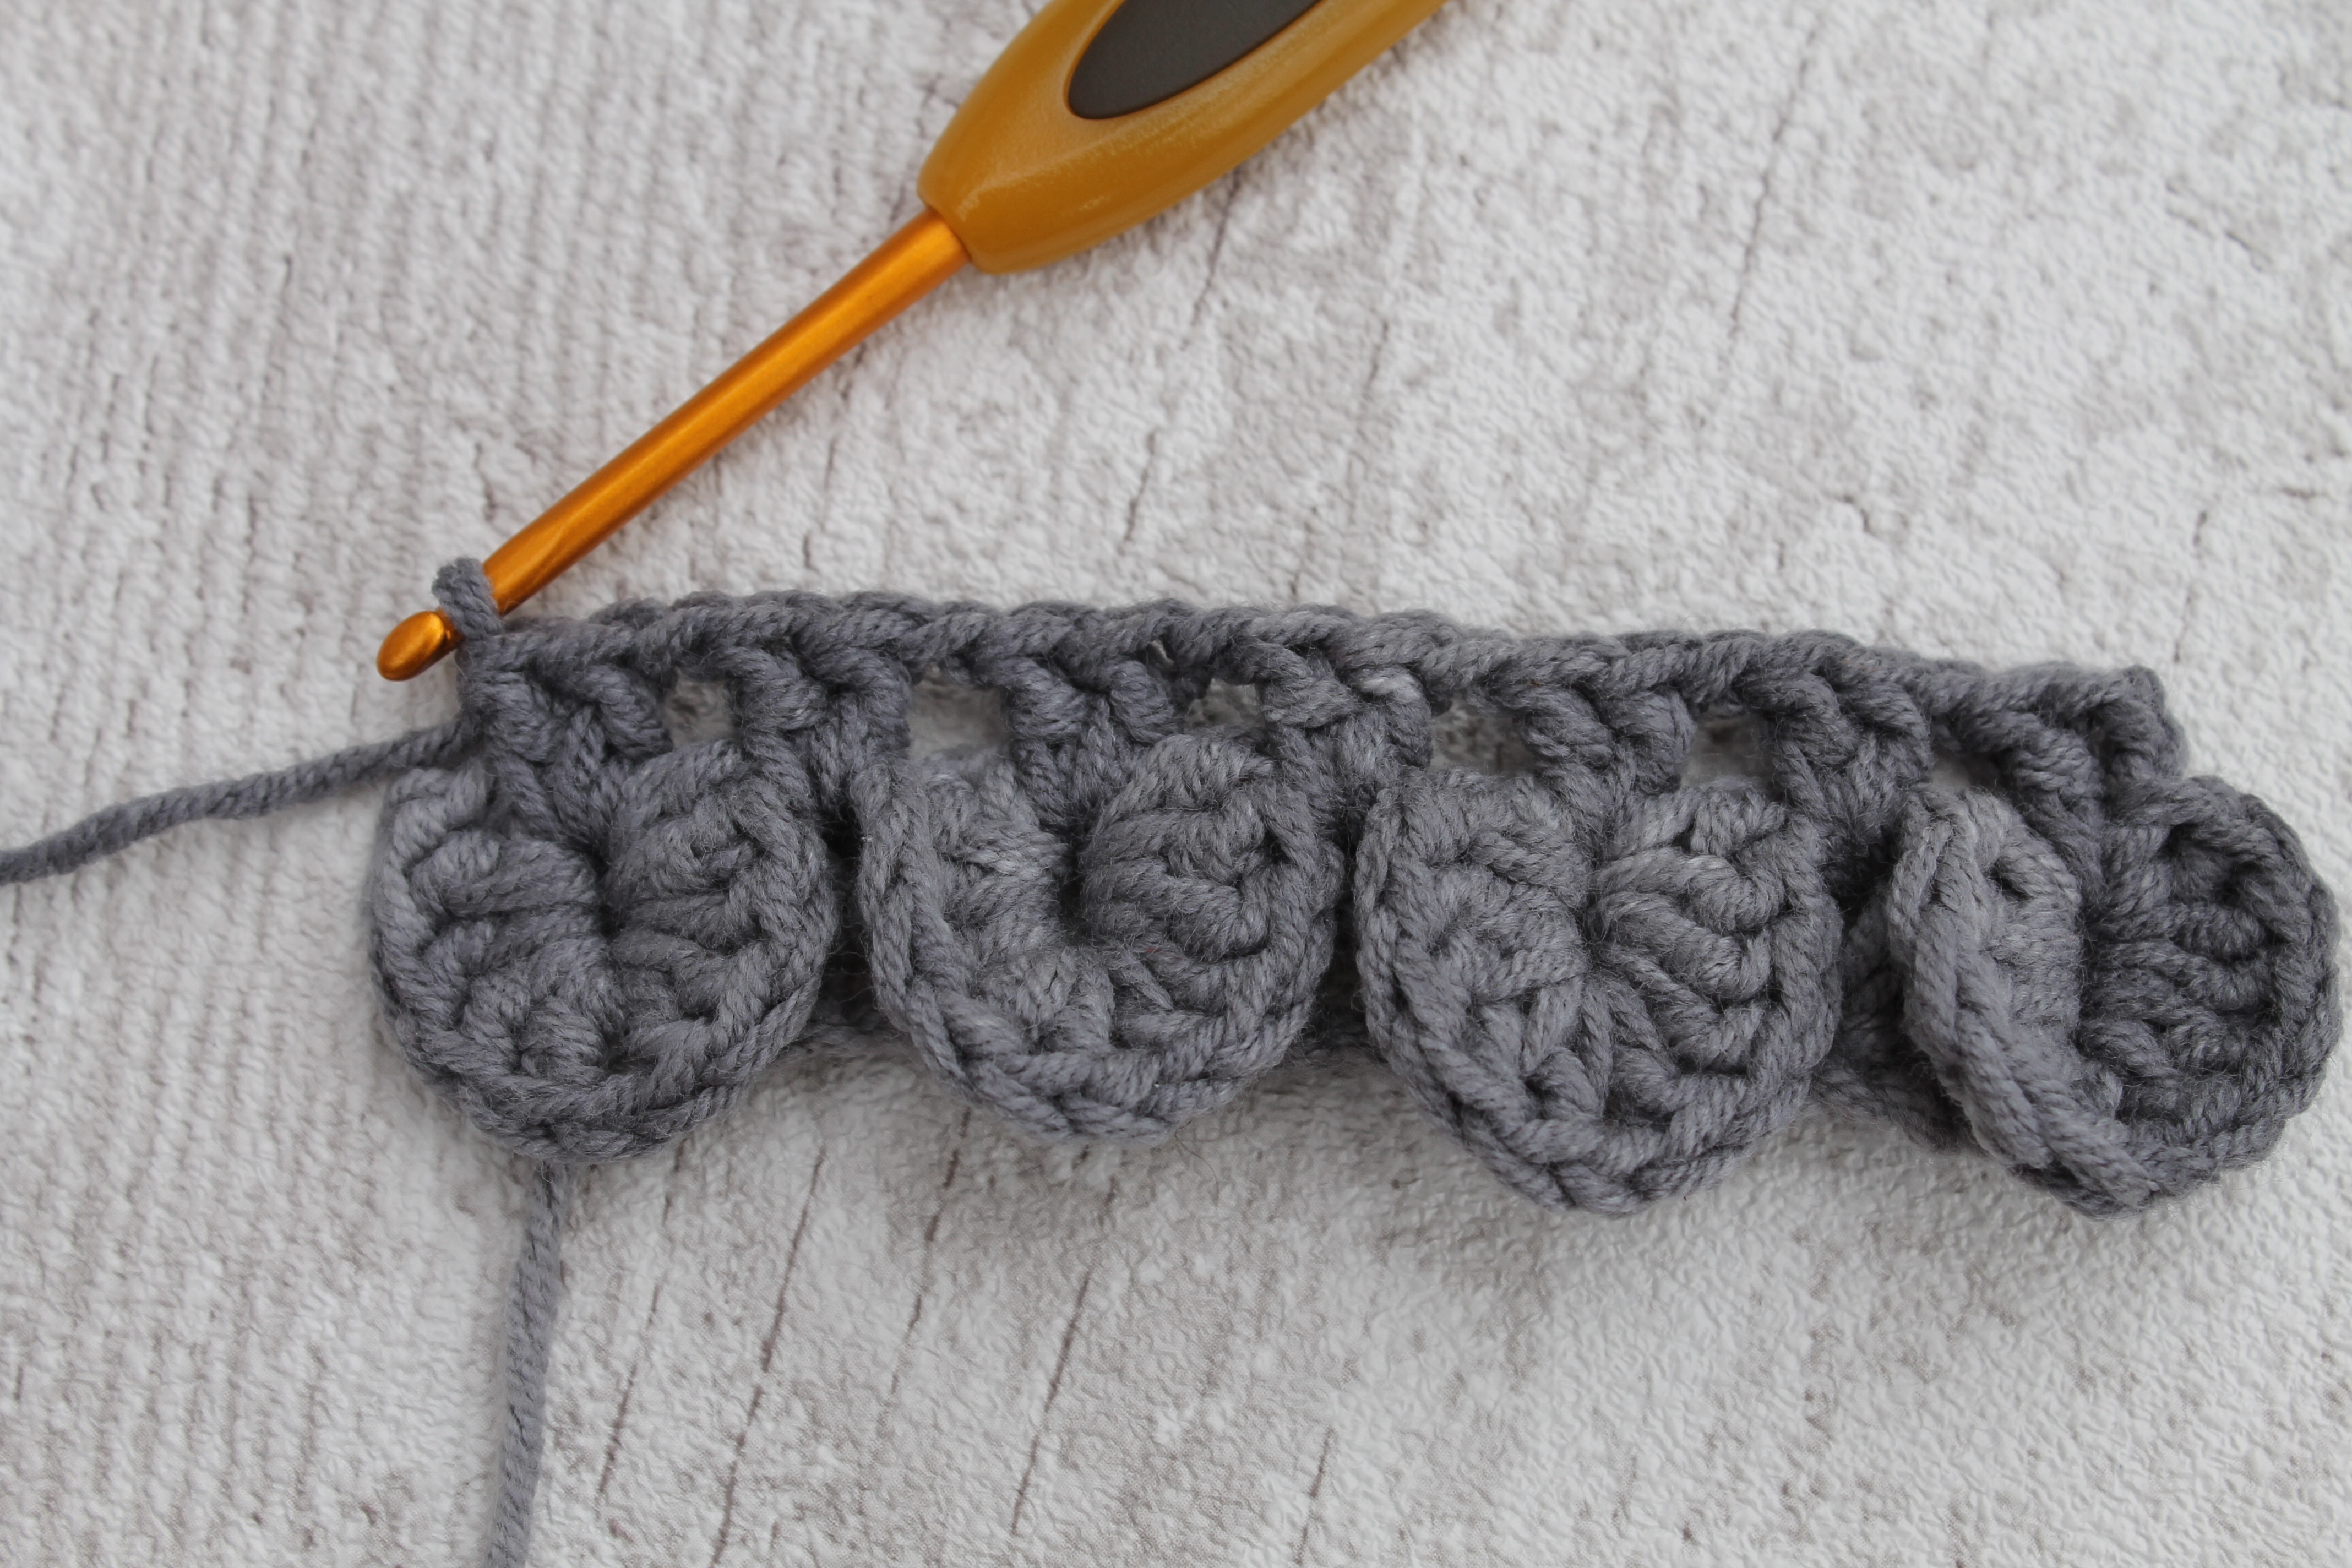
8. Make the next set-up row, as in row 6. Ch3 (to act as your first dc). 1dc into the base of this ch3. (Ch1. Sk2 stitches and work 2dc into next stitch) until the end of the row.
9. Repeat 3-8.
Have fun!
Great tutorial, thank you.
Thank you – you’re very kind.
Excellent tutorial (and eek! at the actual crocodile)
Thank you!
Genius!
Muchly thank you!
This is a fricking miracle. Excuse the rock band language…
Yes, we must get back to band business. I’ve been very lax…
Awesome. I’m off to make a green sweater in this stitch. 😉
…And I’m sure it will look GORGEOUS, despite my reservations… It’ll certainly be warm.
Thanks for teaching us, I love learning and this is a stunning stitch. Definitely need to make something using it. 🙂
Enjoy. It’s far easier than it looks.
Thank you for this tutorial!
Corine
You’re very welcome.
Thank you
You’re welcome. 🙂
Thank you for the tutorial. The photos helped a ton! Last time I tried this stitch, I was hopelessly confused.
It’s easier than it looks, but there is some less-than-good advice out there.
“Twitch…twitch*…”
🙂
I so want to try this but its such a yarn pig
Do it! Do it! It’s strangely addictive.
Hi, thanks for the clear tutorial. Like the stitch, but for some reason never tried before. Saw a pattern for baby leg warmers with crocodile stitch last week. Think I’ll start on that now…
I really REALLY think you should…
Reblogged this on craftsmondiale and commented:
Came across this awesome blog, and great post. Always put projects with crocodile stitch off, but now I have to try.
I’m honoured!
Thank you for simplifying this stitch. Your tutorial is by far the best one I have come across ☺️ I am so excited that my light bulb turned on in understanding this stitch, thanks again🙏🏼
Thank you – you’re very kind.
an awesome stitch with a great tutorial thanks so much, appreciate your time and knowledge.
Thank you – you’re very kind.
Thank you so much for sharing. I really want to make my Granddaughter a mermaid blanket in this stitch but have been afraid the stitch might be to difficult. You have explained it very well and I’m confident to attempt it now. Much appreciated.
Have fun. Once you have the rhythm of it, it’s easy. Let me know if you have any problems.
i am learning any crochet through internet
i need help
crocodile stitch is done in the first photo of roof in first row 8 crocodile and second row 7 crocodile? again 8 and then 7?
Hi Vidu,
First and most importantly, I am SO sorry for insanely long interval before replying to your comment/question. I’m not sure how or why, but for some reason your comment slipped through the net. Assuming that late really is better than never, I’ll try to answer you. Yes, the number of tiles/scales does change between rows, eg 8-7-8-7-8-7-8 or 32-33-32-33-32-33 etc, because the tiles are slightly offset. I hope this makes sense?
Please can you explain what you mean by “pinch” the last stitch?
Eek, I’m SO sorry for insanely slow reply. Somehow this one slipped through the net. In the vague hope that late really is better than never, here’s my response (assuming that you can even recall your question from so long ago!)
I do literally mean pinch/hold the stitch between two fingers so that you don’t lose it. Does that make sense? Happy to discuss further (and I’ll reply straight away this time, honest!)
Thank you for the wonderful tutorial!
Finally, something that makes sense. I’m doing a backpack and the pattern just didn’t look right because it caused the back of the stitch to face me and the front to the back. Now, I’ll have to tear out three rows, to the base ladder but, this time it will finally look right. Mostly I make jewelry but I also crochet a lot. I wonder how this would look with beaded crocodiles. Hmmm! I think I’ll have to try it.
Thank you wonderful pattern. Going to try this soon!
You’re welcome. Enjoy!
Thank you so much for making this crocodile stitch more of an understanding way to crochet this pattern. It makes the pattern so much easier. Thank you once again ,, Linda Waterman.
You’re very welcome! Glad to be of service. 🙂 I must find time to write some more tutorials.
Love the look of this! Struggling a bit on my second row of scales, how do I get from the leftmost pair of DC to the pair of DC where I start stitching again? Meaning after I finish stitching pair seven, how do I get back over to pair six?
Why can this not be printed out
Okay, want to add my thanks to the above – new to your blog, but so love it. Thanks for sharing your lifecraft! This tutorial is super-clear, and I now understand a new stitch for the repertoire, ta muchly. One question – I completely adore your ring – wherever did you find it? x
Thank you! I bought the ring years and years ago in Greece, when I was visiting my friend in Athens. It does tend to catch on things such as clothes and children, so I don’t wear it as often as I’d like to.
You’re right your version & Mickey of Crochet Crowds are easy to follow. I also learned the hard way of crocheting too much D.C. on the Foundation Row. Thanks a lot for these wonderful written instructions. You’re the best!!! Hope to see more of these written crochet pattern!!! I admire you so much!!!
Thank you so much! I don’t deserve such high praise, but I’m grateful anyway. 🙂
I’ve been learning to crochet for the past two years but was intimidated and would not try the crocodile stitch. Thank you for taking the time to show how the stitch is done so even a novice can understand it. Am looking forward to using this wonderful stitch in a pattern.
Excellent tutorial. I’ve gotten lost on others. I like the alternating row look, easy to decrease. I’m working on a wall hanging of a harvest lady and this will work great for the skirt.
I’ve always been intimidated by this stitch. Thank you for making it a little easier to learn ?
Could you (or maybe you already have) do a picture or video for the crocodile bracelet? I got the first ‘scale’ with no problems, BUT couldn’t figure out how to go from there – the scales are attached top to bottom rather then side by side. Would really appreciate, my 11 year old granddaughter is waiting no so patiently for a bracelet. Thanks so very much. Annr42@icloud.com
Hi Ann, Thanks for your comment. I’m slightly confused – what’s the bracelet you’re referring to, please? There isn’t one in this post so I wonder if it’s from a different site? Am happy to help if I can…
Spent most of yesterday looking for examples, etc of the vertical crocodile stitch and FINALLY figured out what I was doing wrong and how to do it right. I am including the web address to the site that showed the bracelet (hope I’m not breaking any rules by sending it). Sorry it took so long to reply. Didn’t see your email until just before I was heading for bed last night. Thanks for such a prompt reply to my question.
I am so pleased with your crocodile stitch tutorial, You make turning the scale so much easier than other instructions. Thank you.
This is the explanation that finally made sense. Thank you for posting it, and thank you for NOT doing it as video-only. I detest video tutorials because they are too fast and too frustrating to stop, start, and rewind, so I greatly appreciate having this in written pictorial form. Thanks!
One question – how does one go about increasing and decreasing with this stitch? Both in a row and a round.
Thanks again!
– Seliah
If I want to have 2 or 3 colors how do I work that in