Hello! Do come and sit here beside the fire. I have much yarnery to share with you. (But the latest Stylecraft Blogstars weekend shenanigans should probably wait until next post.) Meanwhile in response to a dozen or so requests, I promised a post about how I went about designing this thing:-

So here goes. I’ve written before (five years ago! Oh, for the youthful naivety of being 41!) about designing stranded motifs. But this 123 500 – stitch behemoth made its own rules. Just as I write this blog on paper before typing it up, I like to design motifs on knitter’s graph paper. (Staring at a screen kills my creativity stone dead.)

But… problem. The paper I would have needed to hand-design this would be so large that the neighbours might have complained about it blocking out their light. So I used the online software at stitchfiddle.com. And I bought a very basic drawing tablet that I could connect to the laptop (a Huion H420, in case you’re curious). But I did make lots of sketches on paper…

And…
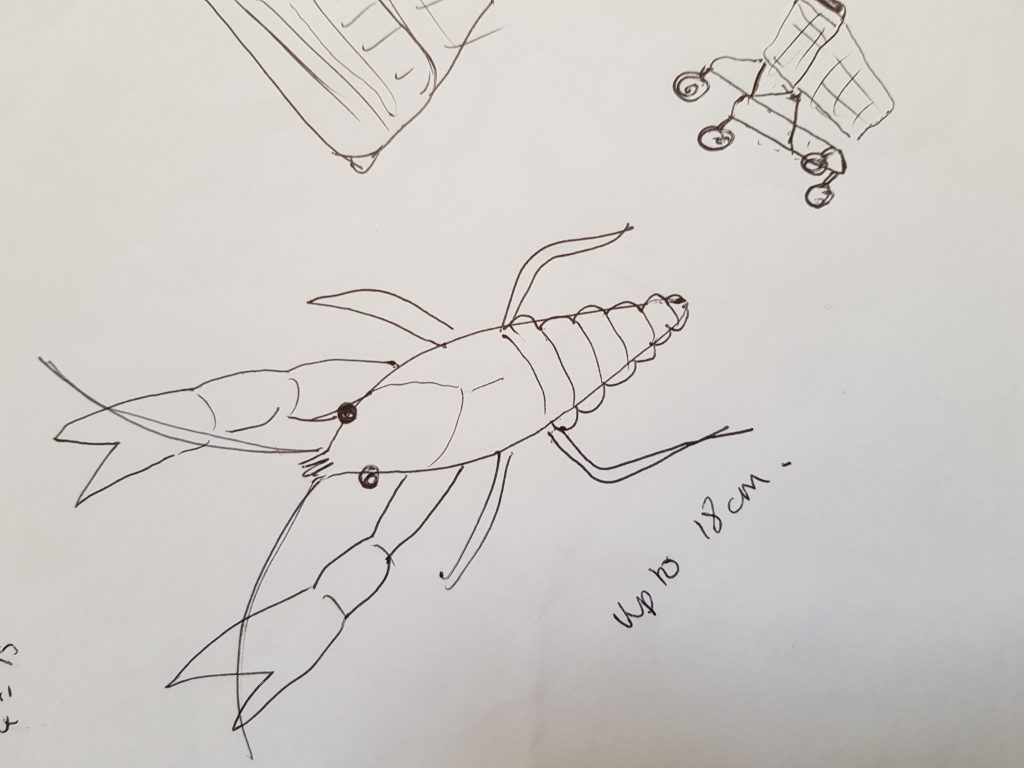
As well as…
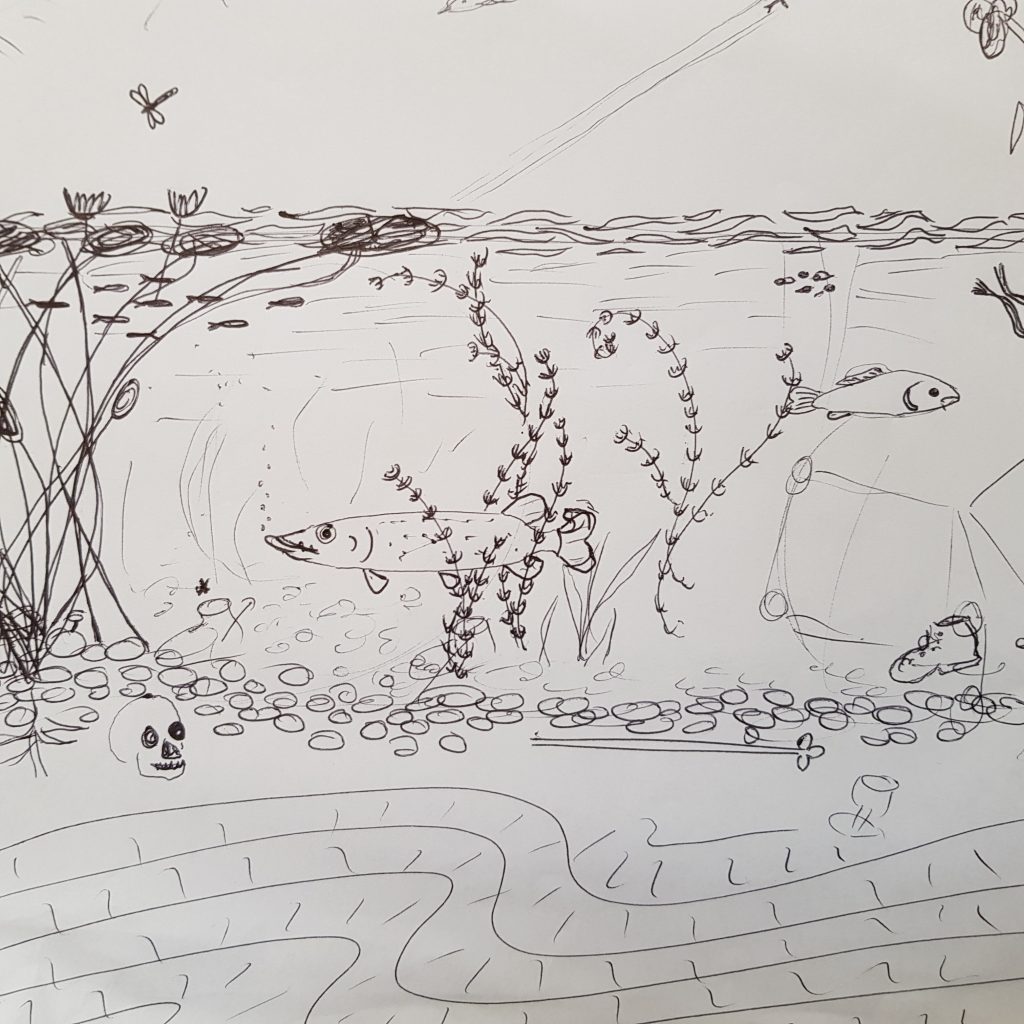
Then electronic pen in hand, I began to draw. Here’s a little video of how it works:-
The most difficult object by far was the boot. I wanted it to look old and battered, yet recognizably boot-like. It needed to be small, yet detailed. I very nearly gave up.

I’ve already written a post about the what and the why of all the things in the picture. But today’s post is about the how. Lots of things can be translated into stranded motifs, but there are some constraints to bear in mind.
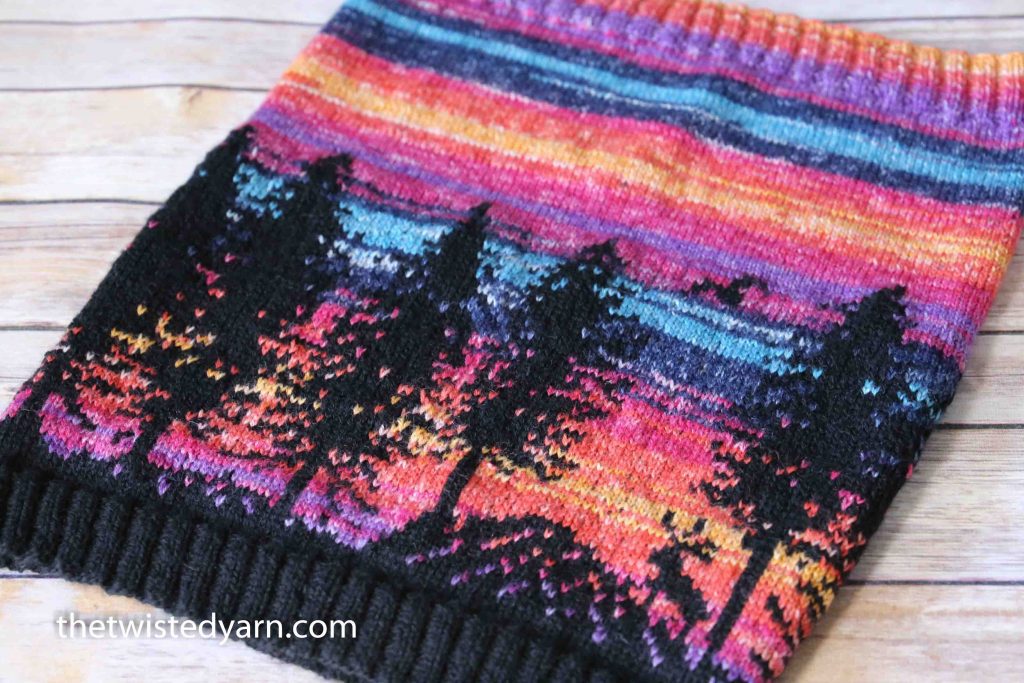
Call me a weirdo (you wouldn’t be the first) but I tend to look at my surroundings in terms of the degree to which they can be translated into stranded knitting. (See? Weirdo.) Let’s consider for a moment the constraints of the technique. In stranded work, you use two* contrasting shades within each round/row. Between rounds/rows, you can shift one or both colours either subtly or dramatically. So you can create motifs with any number of new colours introduced vertically, but horizontally you’re rather more constrained. Am I making sense here? This lends itself to certain types of images. Below is my ‘Hiking Reindeer’ cowl: I made the most of the dramatic contrast within rounds, and slowly shifting shades in the sky between rounds. Trees against sky are perfect for that. See what I mean about seeing the world around me in terms of its stranded potential? The free cowl pattern is here, in case you’re interested.
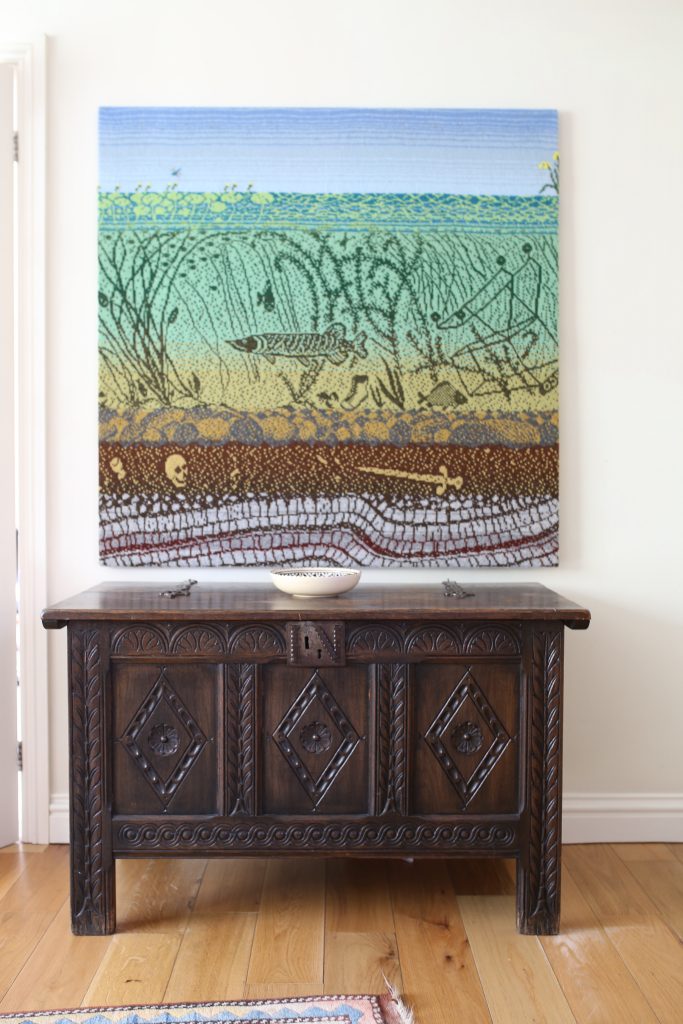
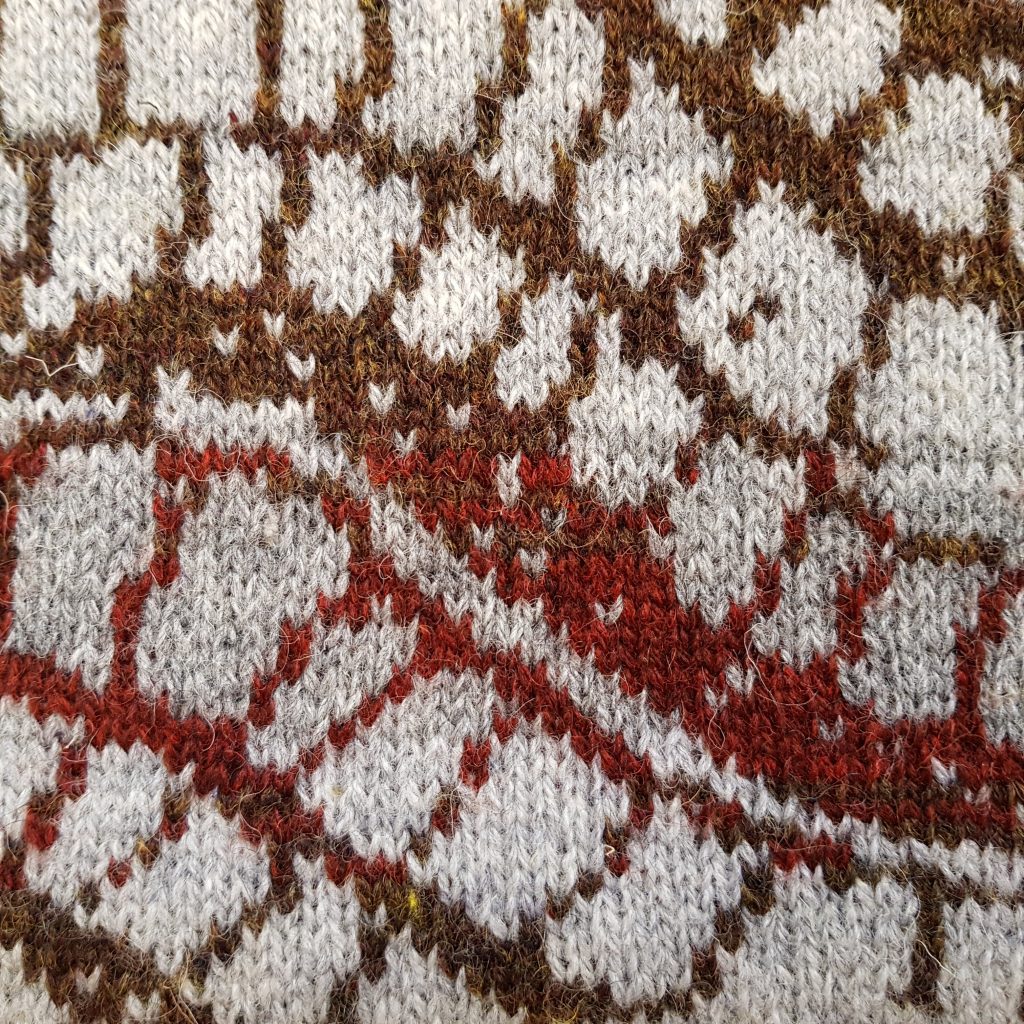
Going back to the current piece, some parts of the scene were particularly suited to stranded work. The gently folding rock strata underground are an obvious example, with sharp lines of shale contrasting strongly with the chunks of limestone. But within the shale and within the limestone, I worked slow and subtle changes in shade. The yarn shades were all solid, so I swapped similar shades in and out between rounds to soften the change of colour.
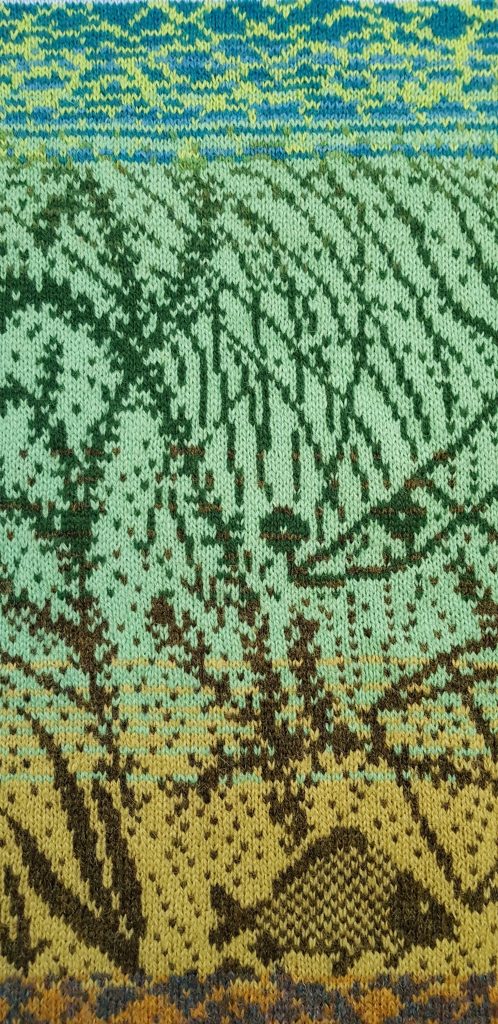
The same applies to the weeds beneath the water. I spent a great deal of time looking at underwater photographs of rivers and lakes, in order to get the colours right.

It came out OK:-
The other major constraint when you’re designing stranded work concerns the length of run of any one colour. Whilst you work stitches with the active colour, the inactive colour is carried behind the work as a ‘float’. Overlong floats are a problem: they can be accidentally snagged by careless fingers, and they risk being too loose or too tight and thus messing up the boundary between colours. Yes, you can ‘trap’ your long floats as you work, but the easy ideal approach is to avoid long floats in the first place. Here’s the reverse of the finished object, because it’s good to show your working:-
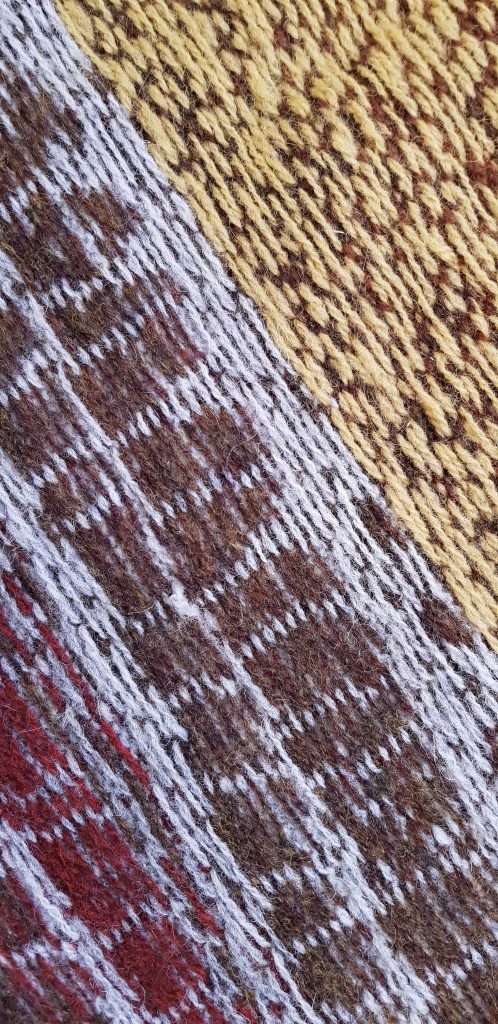
For reasons of yarn gauge, plus the fact that this was going to hang on the wall rather than be handled by snaggy fingers, I decided to max out at seven-stitch runs wherever possible. Where wider areas of one colour existed, I added dots – not a problem for the subjects of this image – or little extra design elements.
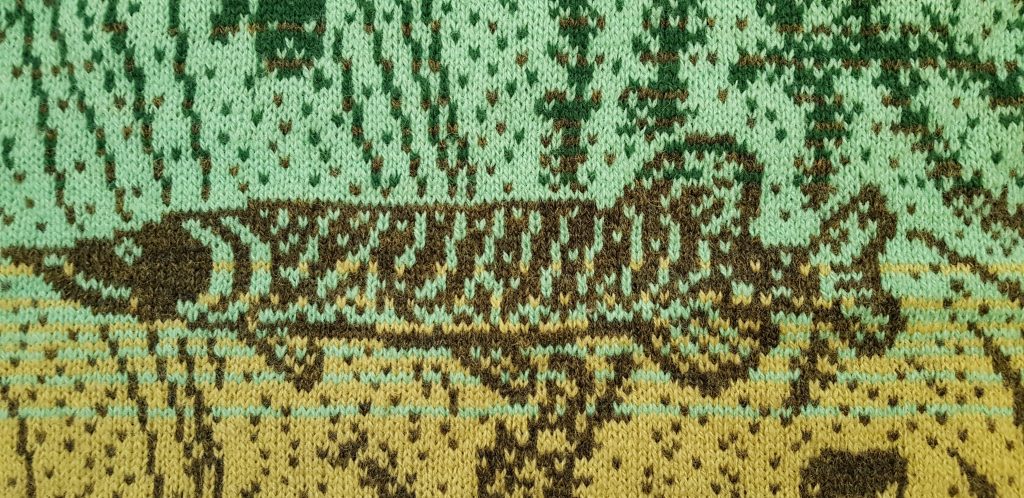
The main place where I broke my own rule was with the outline of the pike. I’d spent so long looking at drawings and photos of pike, and I was so enjoying recreating it in yarn, that I allowed some terribly long floats, which I trapped in place every few stitches. Please don’t tell the knitting-police, OK?
If I were to knit this again (!) I’d do some more work on the design, especially the weeds and the shopping trolley. And whilst it was in progress, I did at one point rip back 14 000 stitches because I wasn’t happy with the colours. But now it’s finished, it’ll have to stay as it is, flaws and all.
So, being a bit of an evangelist about these things, can I persuade you to start work on your own stranded designs, if you haven’t done so already???
*Yes, you can stretch to three, but only if you’ve taken leave of your senses.
this is one of the best pieces of knitting art i have ever seen … your knitted chair seat cover being one of the other bestest!
thank you for sharing how you designed this.
you are a ‘knit artist’ par excellence!
with great admiration,
margaret/daisy
Thank you for sharing this, there is so much to look at and enjoy! I commented before about the boot (looks like the kind of boot my husband would catch while fishing). It looks so great on your wall!
I too love to push the boundaries and design stranded knitting. Who cares how long the floats are? Especially with good sticky wool. Thank god there are no knitting police since I’ve made verrry long floats, even without counting the stitches. Here’s to knitting freedom!
This is a work of art and the fact that you managed to produce it in stranded knitting
makes it a technical masterpiece too. Well done you!
Thank you for this post. I find this so interesting/amazing/spectacular! This really helps to demystify the how but not the wow! I really want to learn stranded knitting. I’m going to start out small so I can be successfull and be overwhelmed. Thank you for your inspiration!
Oops! Not be overwhelmed! Lol!
????????????????
Your massive projects are so different from the simple little things I like to create but it is so fascinating to see how you work. Very impressive!
aaawwweesoome!!!!!
Love, Love, Love it – and you. Your brain, your wit, your attitude – all such a treat. Making a sweater for myself, conceived it as loose and easy to grab when going for a walk late in the day – making raglan sleeves, knit from the top, etc. so at the point where I thought it might be time for the ribbing at the bottom I pulled on the sweater and saw that it FIT PERFECTLY – only problem was that this was not what I wanted or intended. Slept on it and first thing the next morning (before even meditation) I ripped it out back to the separation at the armholes. I fixed it and now am working the torso AGAIN so grateful to you for sharing all the agonies of creating which frequently include ripping out! Alexander Calder flew back and forth across the Atlantic several times so he could adjust the mobile he made for MOMA!! Art can be arduous.
Really appreciate you sharing your creativity and process for this fabulous piece of yarned art. Especially explaining the horizontal restrictions vs the lesser vertical restrictions in stranded designing. That really clicked for me, now am scanning everything around me anew for its potential to be stranded! Will start small, of course 😉
How incredibly beautiful. Thank you for sharing your process. I am amazed.
You were kind enough to tell. Me your yarn choices for your banner. The 2826 must not be made any more so what would you use instead? Again I’m no good at finding the right colour to get close to the design you have woven with just two yarns. Thanks in advance. L
Hi again, I’ll post my reply under your question on my contact/media page…