It’s never, ever, a good idea to begin a blog post with the words “Sorry it’s been aaaages – I’ve been super-busy”. But sometimes the temptation is so strong that I have to tie my own fingers up with yarn to prevent them from writing those words. Because yes, it’s been a while. Mostly, I’ve been in a hole. No I’m not talking about a pit of existential despair, thank goodness, I’m talking about an ACTUAL HOLE IN THE GROUND. One day very soon (possibly tomorrow), this will become a wildlife pond:-
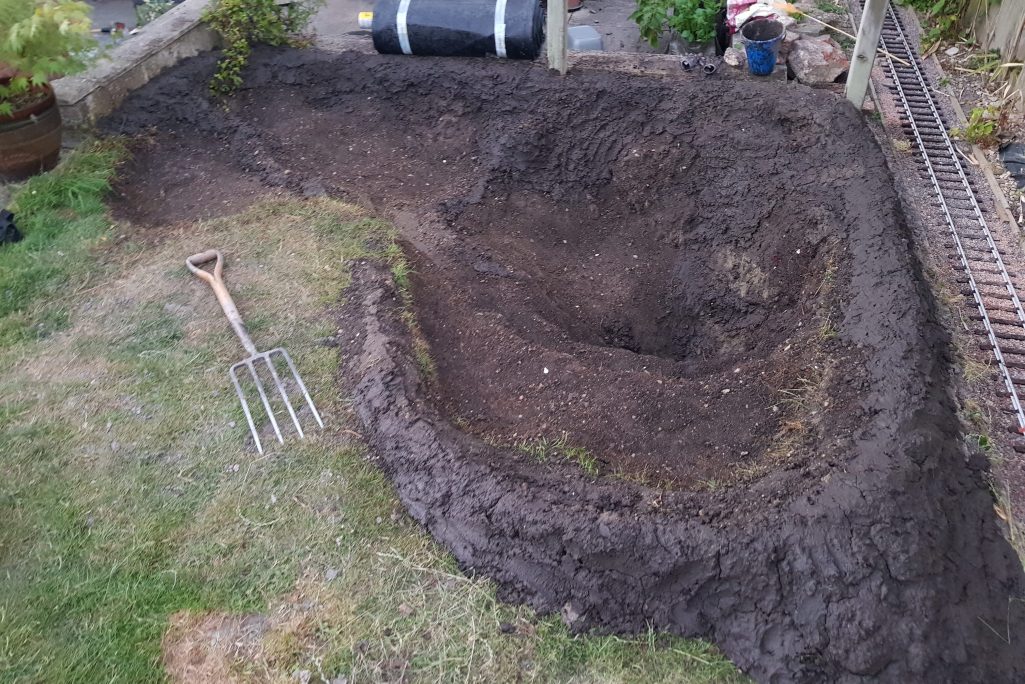
But more about that in another post.
I have – at last – written up the pattern for my little crocheted plant-holders, in case you’d like to make some yourself. I say ‘some’ in the plural, because they’re quick to hook, and I think they look better in a cluster than alone.
To remind you of the micro-story, my parents gave me these balls of garden twine as a gift from their holiday, knowing that I was unlikely to use them for tying up anything neatly in the garden, because I don’t seem to have inherited the family ‘neat’ gene.
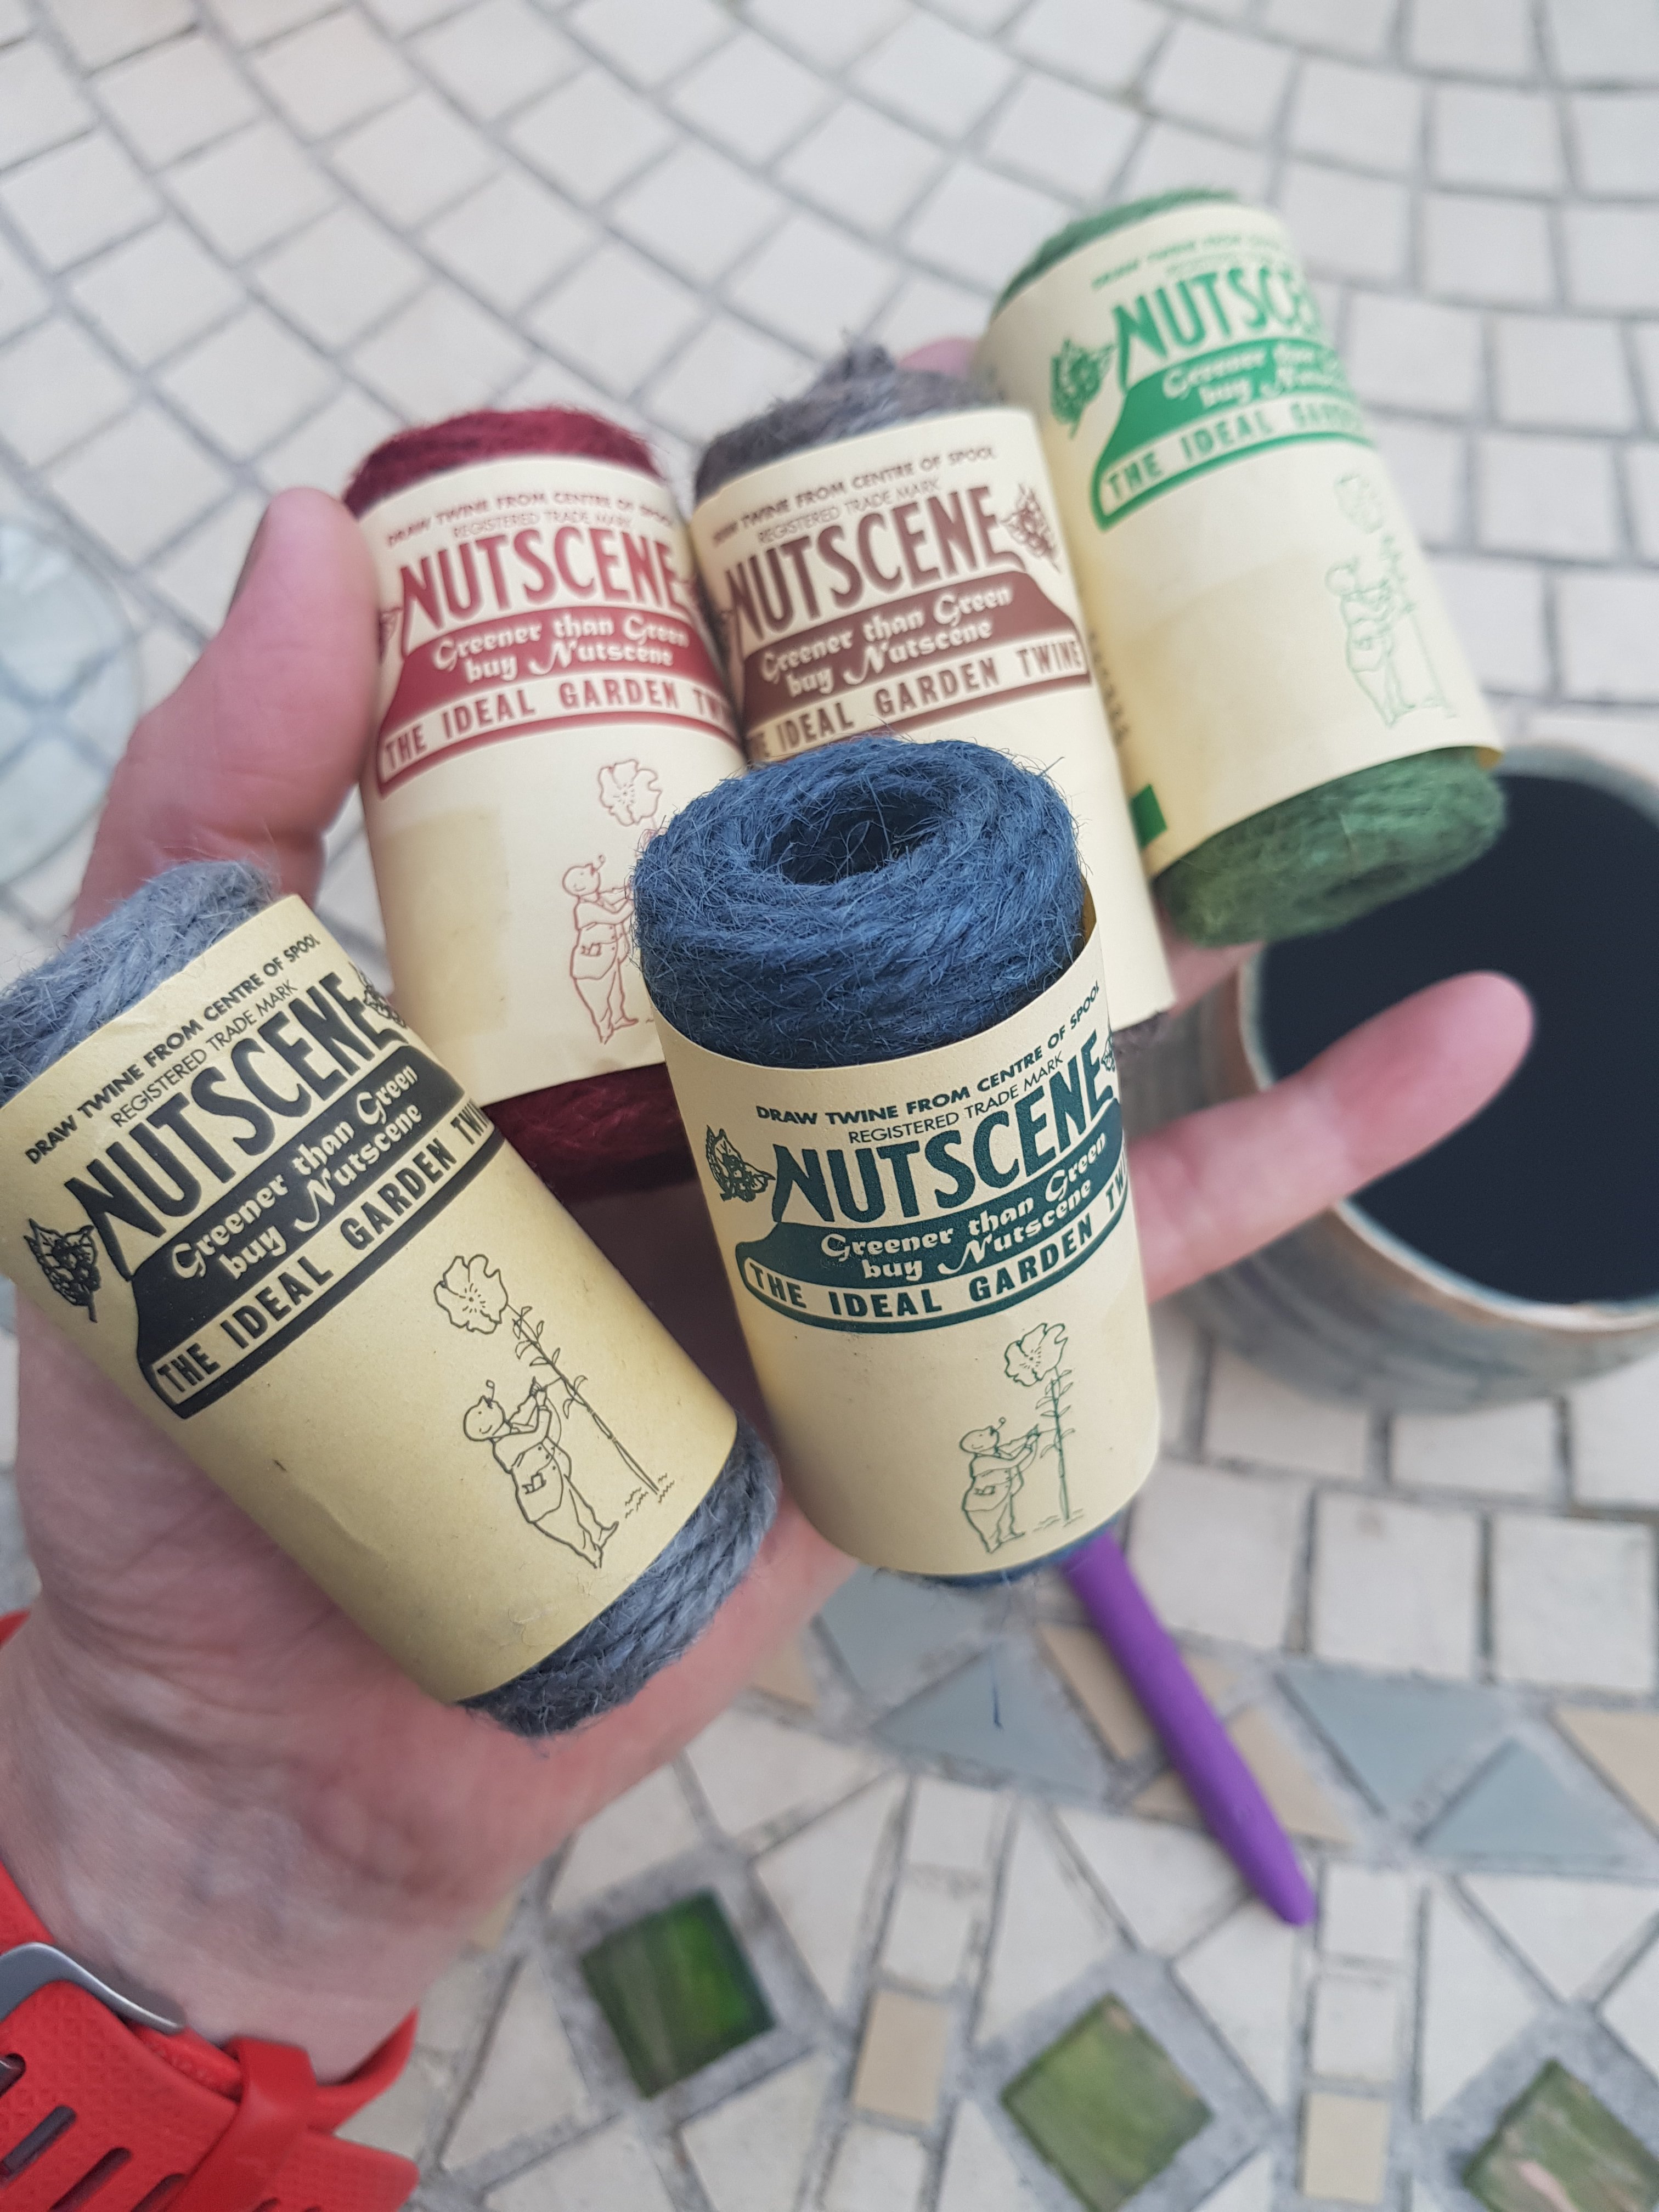
And they sat on a shelf in my study for some time (the twine I mean, not the parents), whilst I pondered what they might usefully become (again: twine, not parents). They’re quite little (again…), and I’m not very good at ‘small’ or ‘quick’ or ‘simple’ projects, so this was a challenge. Even I could see that this small pile of loveliness was not going to be sufficient to knit a life-size replica of the Houses Of Parliament, or any other crazy scheme.
Then at last, whilst buying pond-building supplies at the garden centre, I found some small glazed pots, and a plan formed. To those of you who mentioned macramé plant-hangers in response to my last post, YES! I had a kit for making just such a thing when I was a child. I know exactly what you’re talking about.
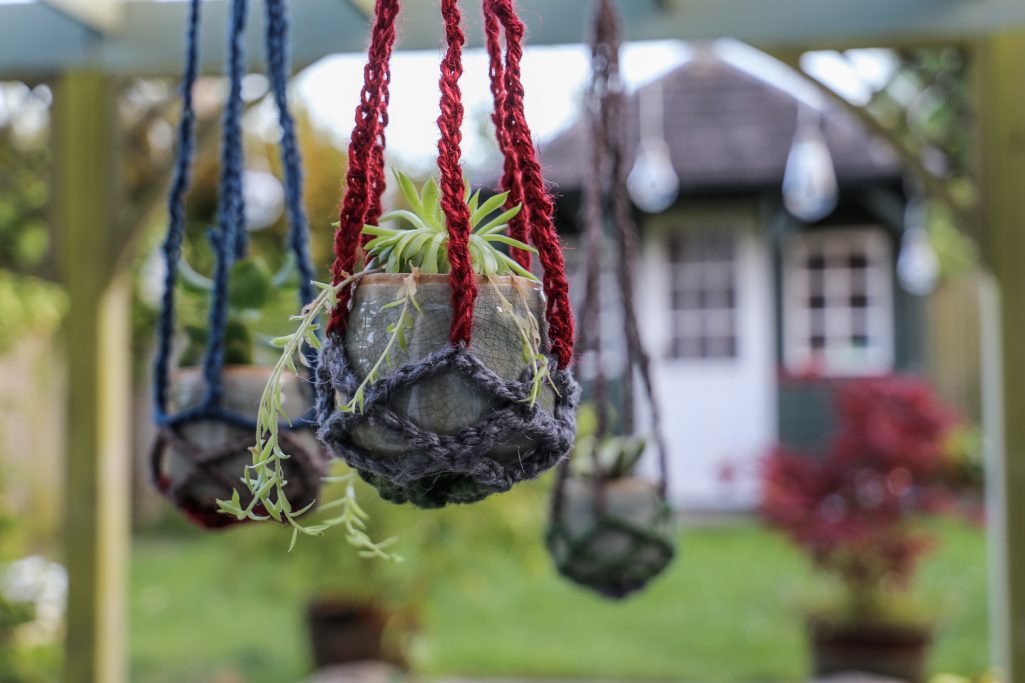
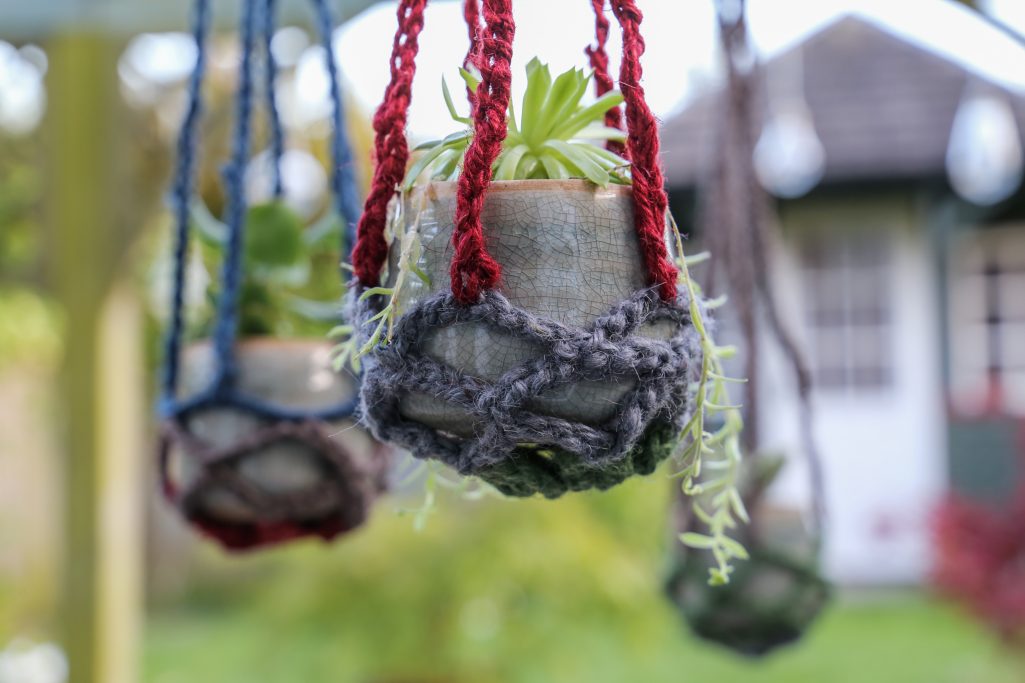
Here’s my crocheted version:-
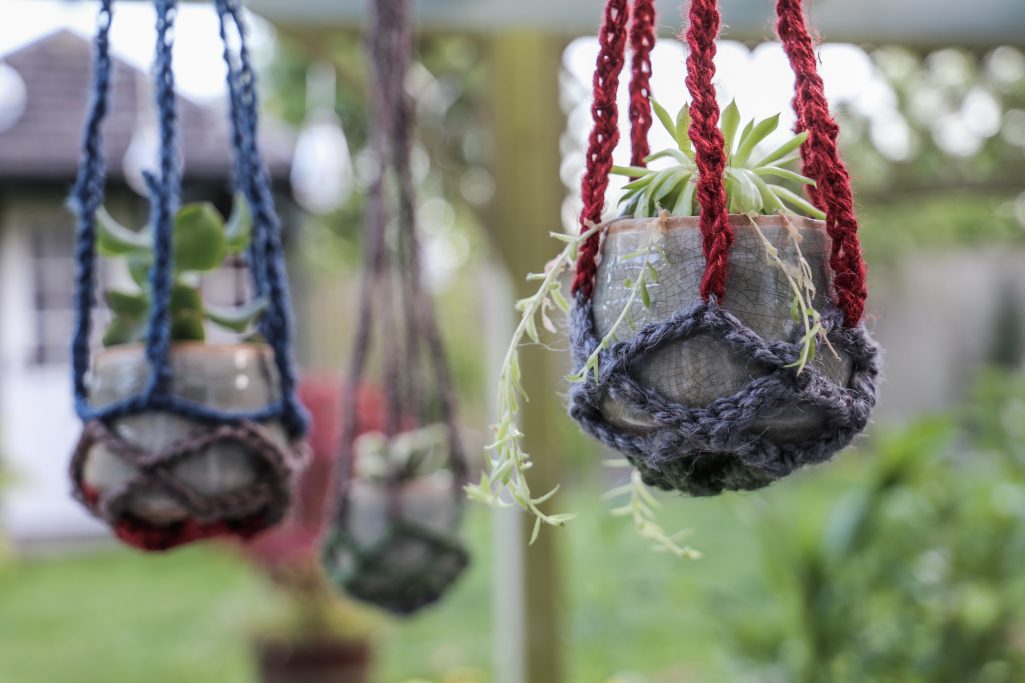
So just to give you an idea of scale, the little pots are nigh-on 8cm (max) wide and 7cm high, with a lovely cracked glaze. I found them in a Wyevale garden centre, in case you’re in the ‘hood, and would like to buy some too. Each hanger is worked in three different shades of twine. The fibre is a roughly DK-weight, at 9wpi. Armed only with a 5mm (H) crochet hook and a hefty dollop of optimism, I set to work.
Would you like the pattern? It’s a little rough-and-ready, just like these plant-hangers. But here goes. I made three hangers using five little balls of ‘Nutscene’ twine, a Scottish fibre that’s still made on the same machines that first produced the stuff in 1922.
So let’s begin.
Choose-ye three colours per hanger.
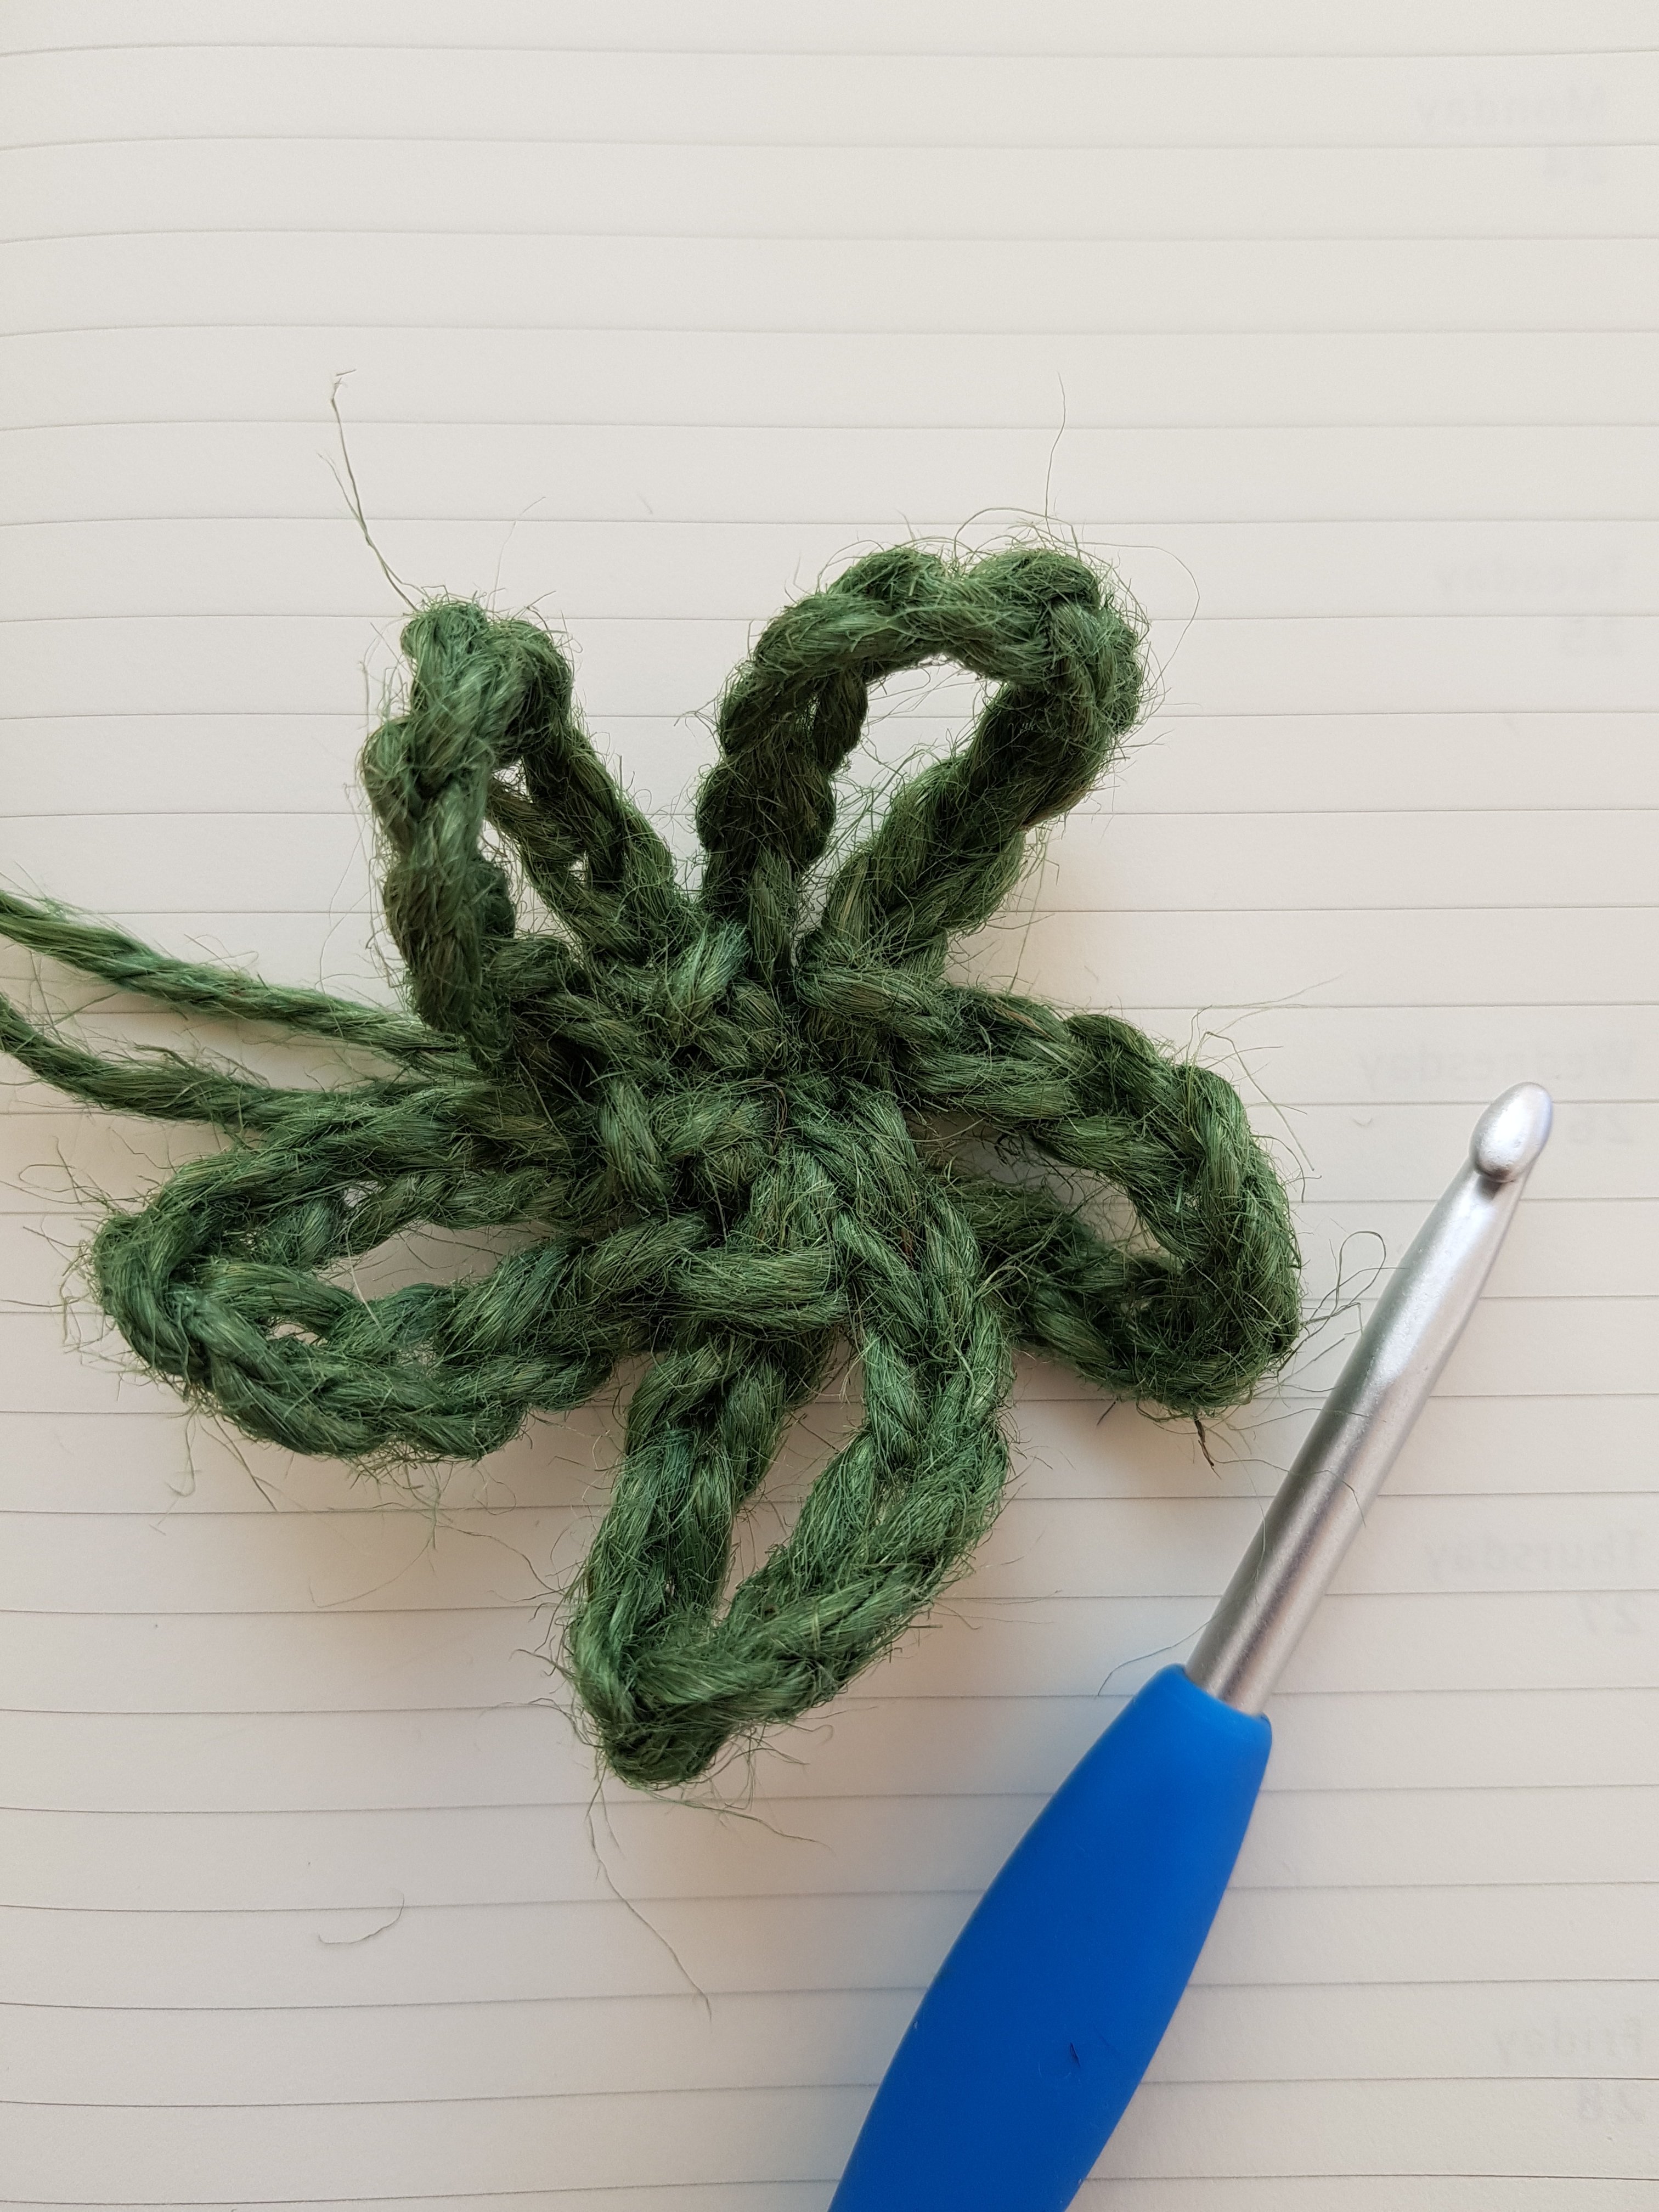
- In your first shade, chain (ch) 9, then slip stitch (ss) into the first ch.
- Repeat the above, a further 4 times. You’ll have something that looks roughly like this… with emphasis on the ‘rough’, because it’s garden twine, not finest silk, and it’s never going to drape beautifully, no matter how violently you swear at it. Cut your yarn and pull through. Notice that your fingers are already starting to look a little calloused from working with the stuff.
- Take a second colour. Make a slipknot, then ch4. Ss into the outermost chain of one of the petals of the flower-shape that you made above. (Ch9, ss into the outermost ch of the next petal) four times. Ch4, then join to start of this round.
- Continuing in the same colour, (ch8, ss into outermost ch of next loop from previous round) 5 times, to complete another round.
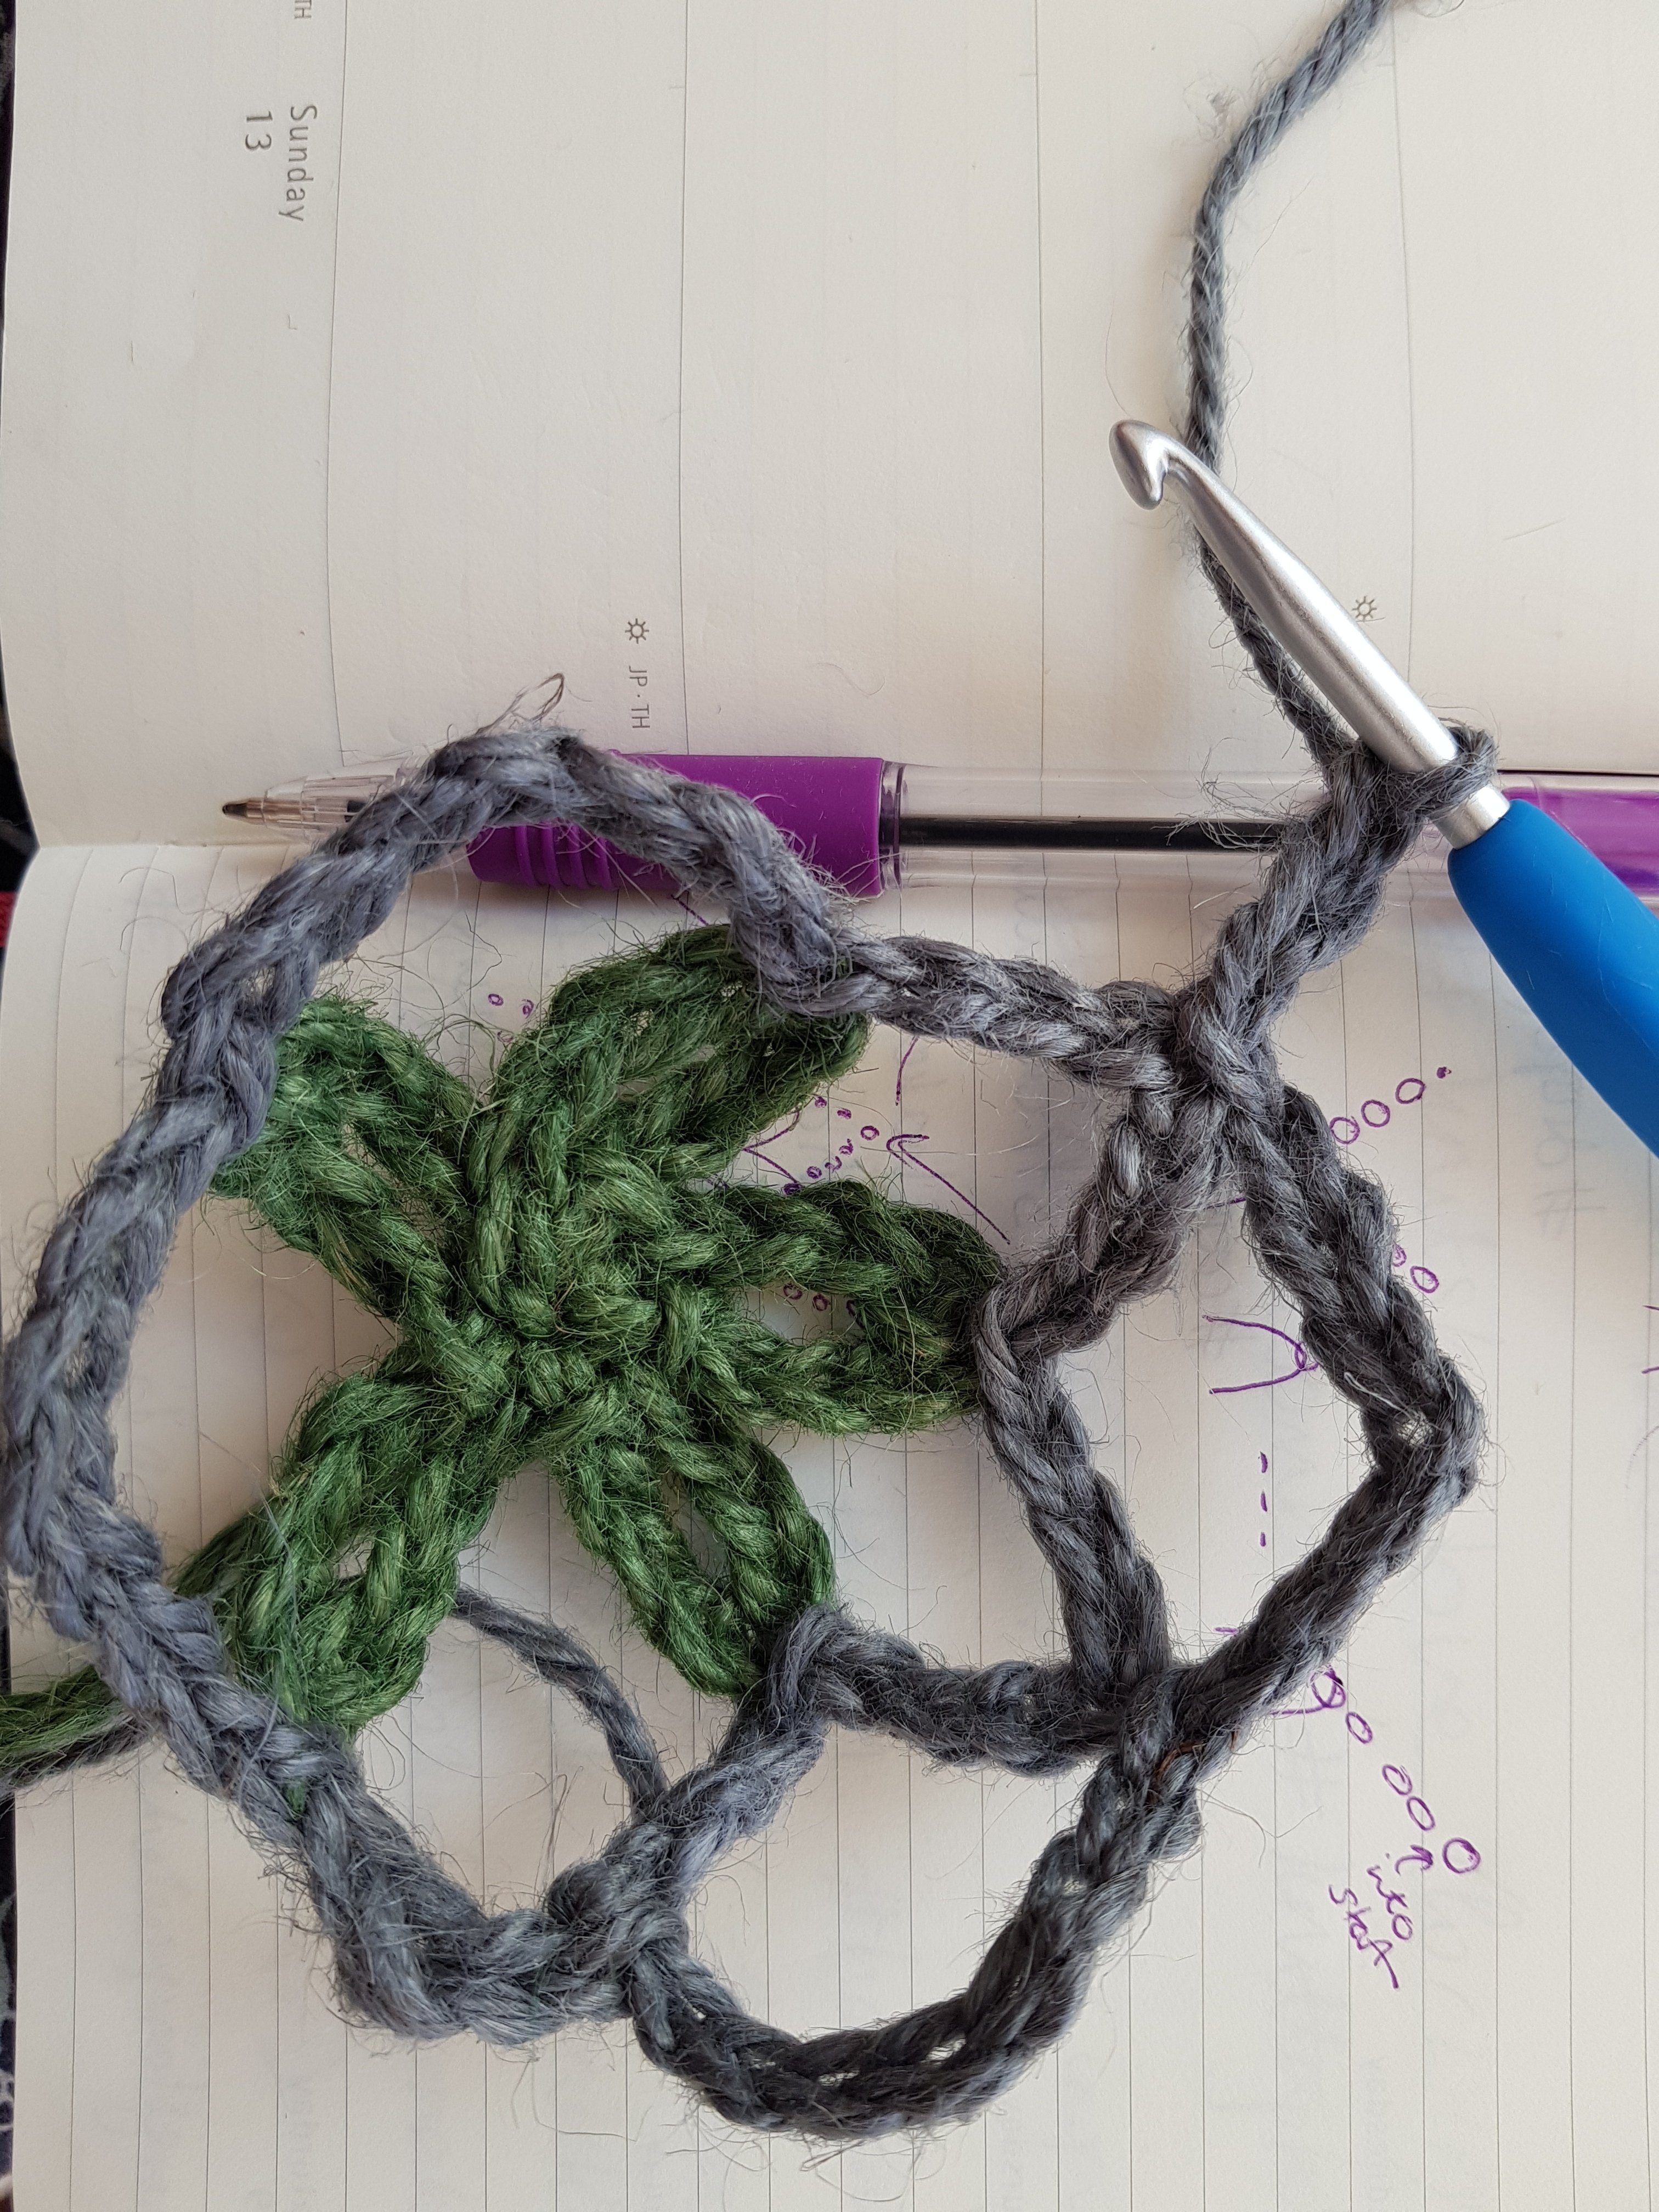
- You’re going to work one more round in the same way and in the same colour, but right now, you’re at the bottom of one of the loops, and you need to be at the top. So, discreetly ss into the next 4 chs, in order to transport yourself to the top of a loop. Does that make sense? Now, work one more round in the same way that you worked the previous round. Cut yarn and pull through.
- Take a third colour. Join to the tip of one of the ‘petals’ from the previous round. Ch50. Pinch the final ch, then ch8, then ss into pinched ch. (This makes a little hanging loop at the top.) Ch49, then join to the tip of the next ‘petal’. Cut yarn and pull through. Join this third colour to the tip of the next petal along. Ch49, ss into the stitch at the base of the hanging loop, ch49, join to tip of next petal along. Cut yarn and pull through. Join same colour to tip of final petal, ch49, ss into stitch at base of hanging loop. Cut yarn and pull through.
- Weave in ends… and you’re done!
(And yes, I realize these photos are a bit below-par today. Pond-building and marathon-training will both be finished soon however, and normal yarny-blogging service will then resume. I’m off for an 18-mile run, now. In the heat. Ouch.)
Happy hooking/knitting.
Phil x
I love your humour in this post! Your parents (not) sitting on the shelf, and so on.
Thank you! I did just feel that I should clarify…
I suspect the passengers on their daily commute have enjoyed watching progress on the pool????
That’ll be the Stoic Spouse…
A lovely alternative use for something; I love Nutscene string. My husband does not understand the need to spend a bit more for a beautiful colour; strange!
I confess that I’d never heard of it until I received this gift. But the colours are rather glorious, aren’t they?
Love your humour – and your hangers. I’ll go looking for my cotton box and decorate my crepe myrtle tree with hanging pots until the leaves reappear …
Now THAT sounds rather wonderful. I’d love to see a picture of the finished result!
Your humour is wonderful. I want to try these but have no idea what the crochet stitch “pinch” is. Could you please explain in three words or less. Love your blog!
It’s not a crochet stitch. I do, literally, mean pinch the stitch between two fingers, so you know exactly where to come back to after making the eight-stitch loop. Oops, that was a little more than three words, I’m afraid. (And thank you for your kind words.)
I am glad I am not the only easily confused person to wonder what pinch the chain meant lol thinking something far too technical! Thanks for sharing love the idea of these!
As always, you are a delight. Please keep us posted on the progress of the pond!
And as always, you are kinder than I deserve. I certainly will keep you posted on the pond: it’s a bit of an obsession.
Oh yes, I am making some of these very soon. Well as soon as we finish rebuilding our verandah roof. Now to find some coloured garden twine here in Australia. Thank you for your clever ideas, it sure helps this creativity-challenged yarn addict
Eek, renewing the veranda roof sounds like a rather tricky project. Good luck… (But on the up-side, you have a veranda!)
Absolutely. And a necessity in our summers.
You never fail to delight with your words and pictures!
The pot holders are super cute, but you appear to have a railway running through the garden too!
Goodness, that hole would be a pit of despair if it were at my place! Bravo, you.